How to use PBR Textures in Blender
Basic Materials
Usage of most materials using the Principled Shader. Apart from the Displacement section, this setup works for both Cycles and Eevee.
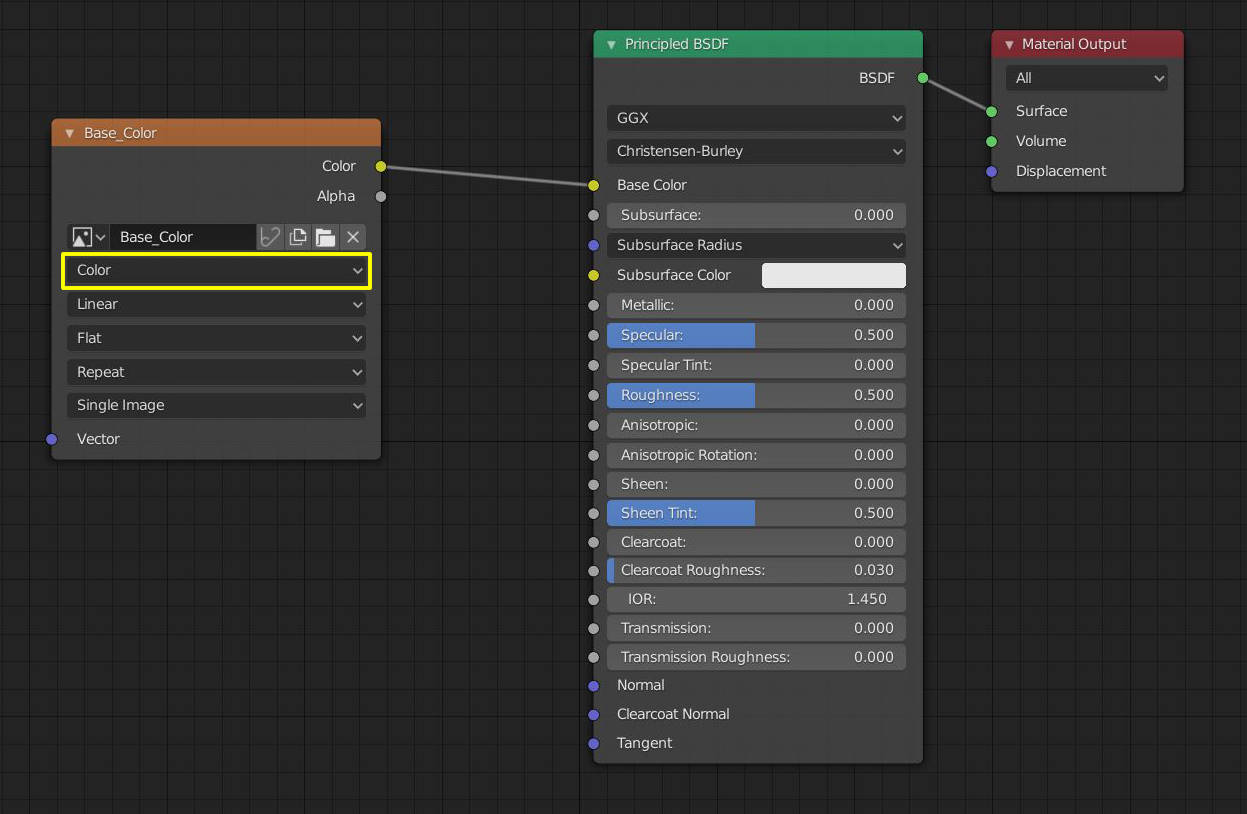
Base Color
The Base Color map defines the color of a surface. It should be plugged into the Base Color input of the Principled BSDF. Make sure the image file’s color space is set to Color.
Roughness
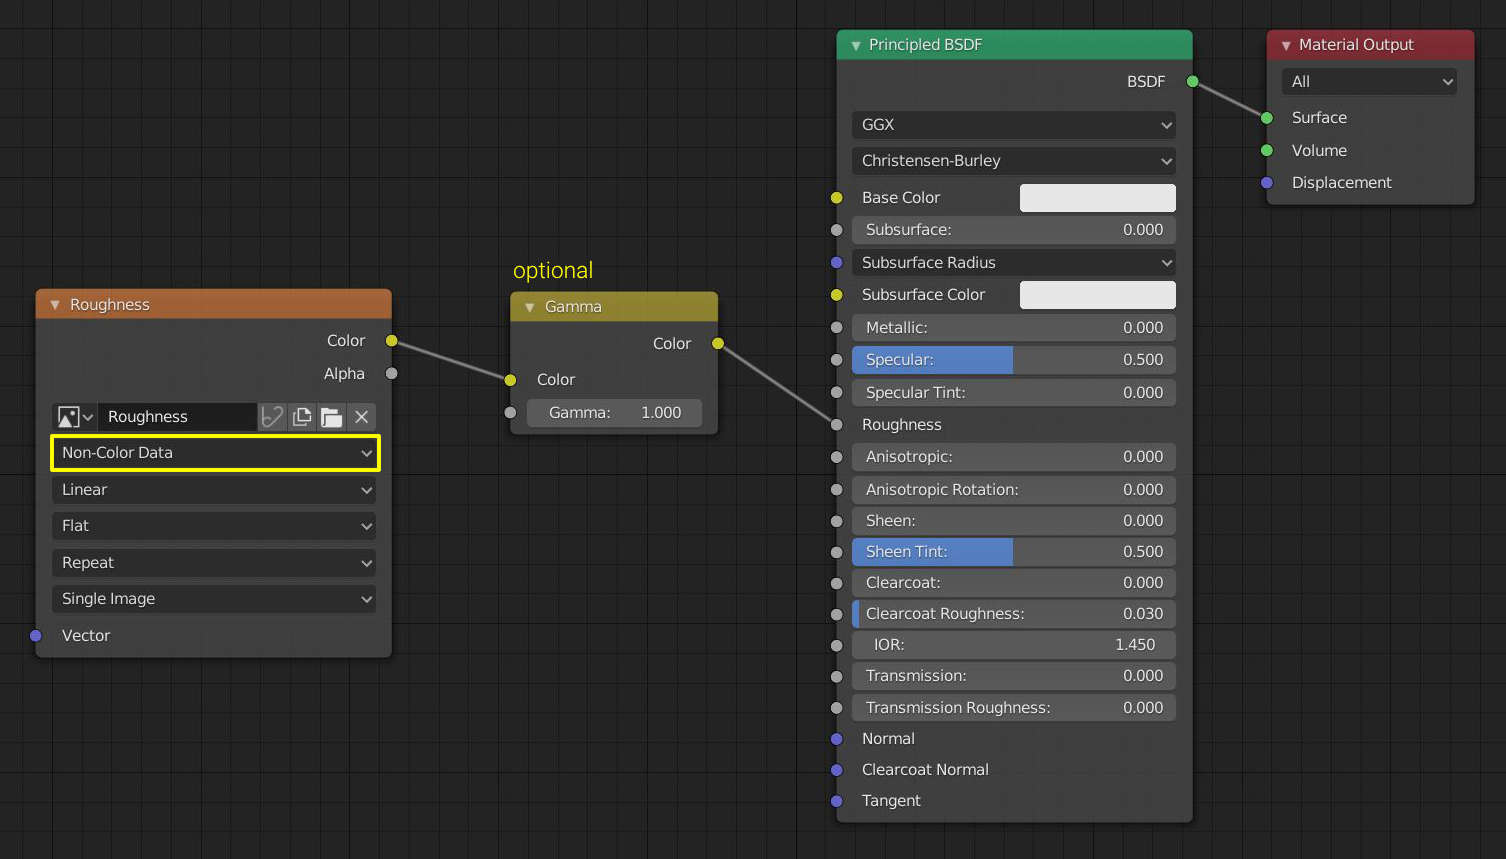
The Roughness map defines how rough a surface is. It should be plugged into the Roughness input of the Principled BSDF. Make sure the image file’s color space is set to Non-Color Data. Optionally, you can add a Gamma Node to easily the roughness of the material. Lower gamma means rougher surface and vice versa.
Height
The Height map can be used to create detailed shadows and highlights on a material or to actually displace the geometry of an object.
If you want to use it for create detailed shadows and highlights, it should be plugged into the Height input of a Bump node, which then should be plugged into the Normal input of the Principled BSDF. Make sure the image file’s color space is set to Non-Color Data. Using the Strength slider of the Bump node, you can control the strength of the effect.

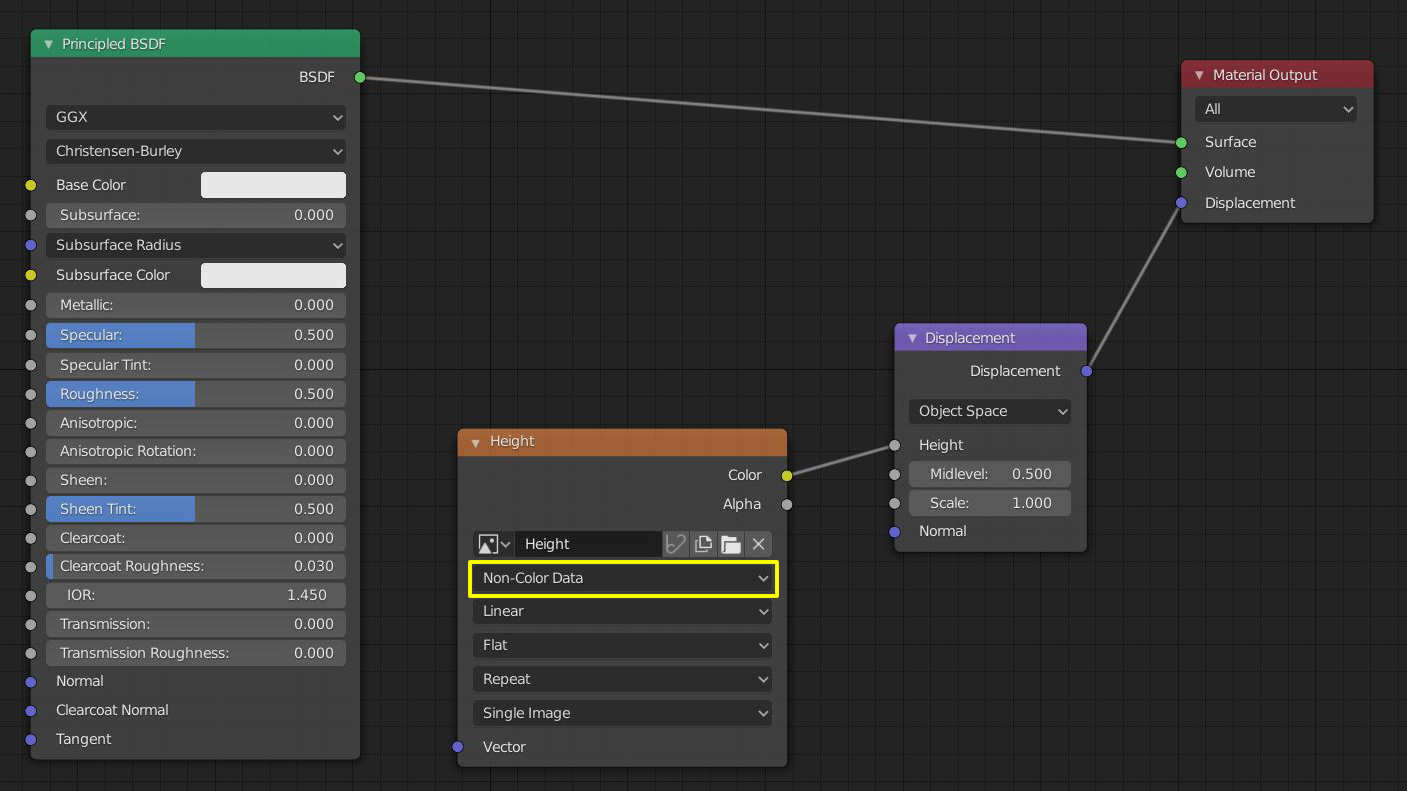
If you want to use it for actually displacing the geometry of your object, it should be plugged into the Height input of a Displacement node, which then should be plugged into the Displacement input of the Material Output node. Make sure the image file’s color space is set to Non-Color Data here as well. Using the Scale slider of the Bump node, you can control how much the geometry should be displaced.
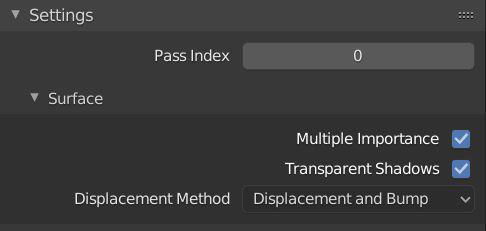
Also, make sure that the Displacement method in the Material Settings is set to either ‘Displacement’ only or to ‘Displacement and Bump’.
Normal
The Normal map defines in which direction a part of a surface is faced, which is used to create detailed shadows and highlights.
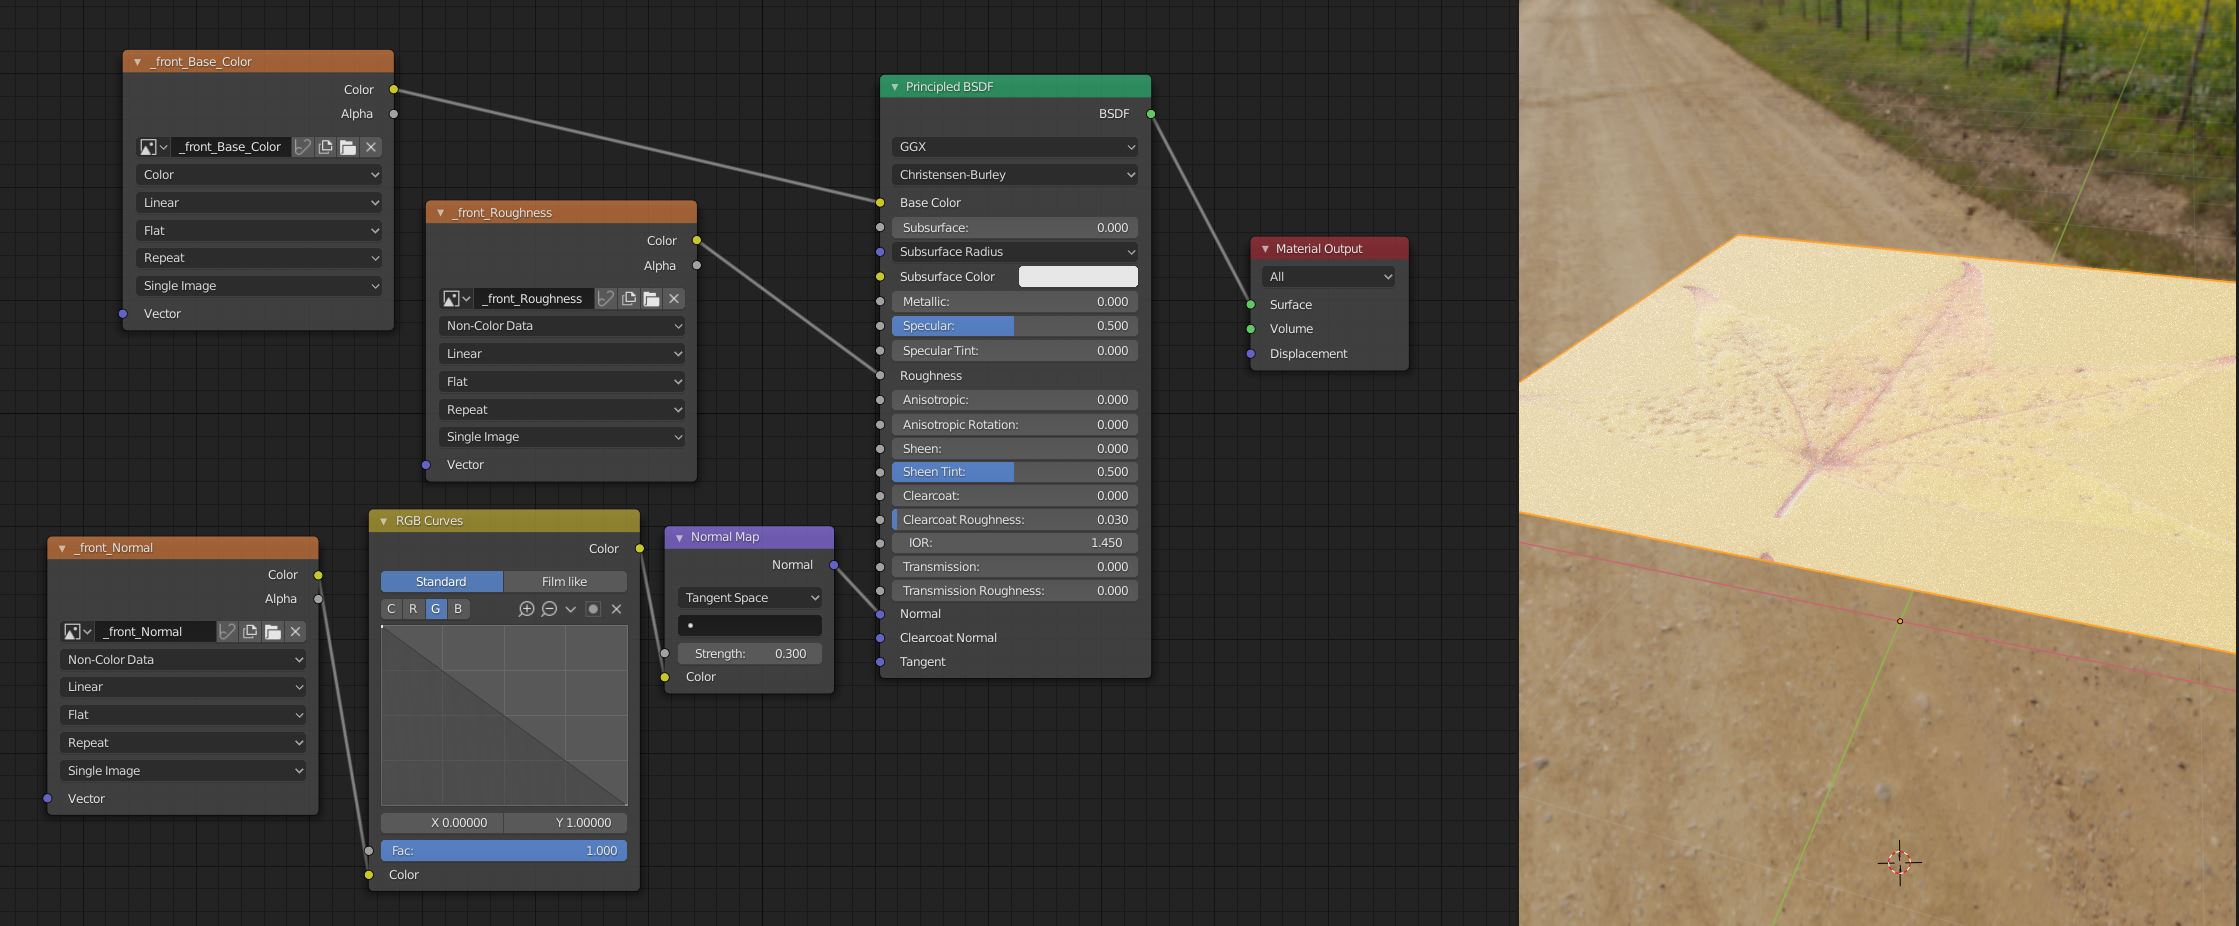
Normally, it should be plugged into the Color input of a Normal Map node, which then should be plugged into the Normal input of the Principled BSDF. However, all normal maps on cgbookcase.com are ‘DirectX’ normal maps, but Blender uses ‘OpenGL’, which means we have to invert the Green channel of the normal map. You can do that by adding an RGB Curves node between the Image node and the Normal node and then changing the curve in the ‘G’ channel to match the curve in the screenshot below. Make sure the image file’s color space is set to Non-Color Data.
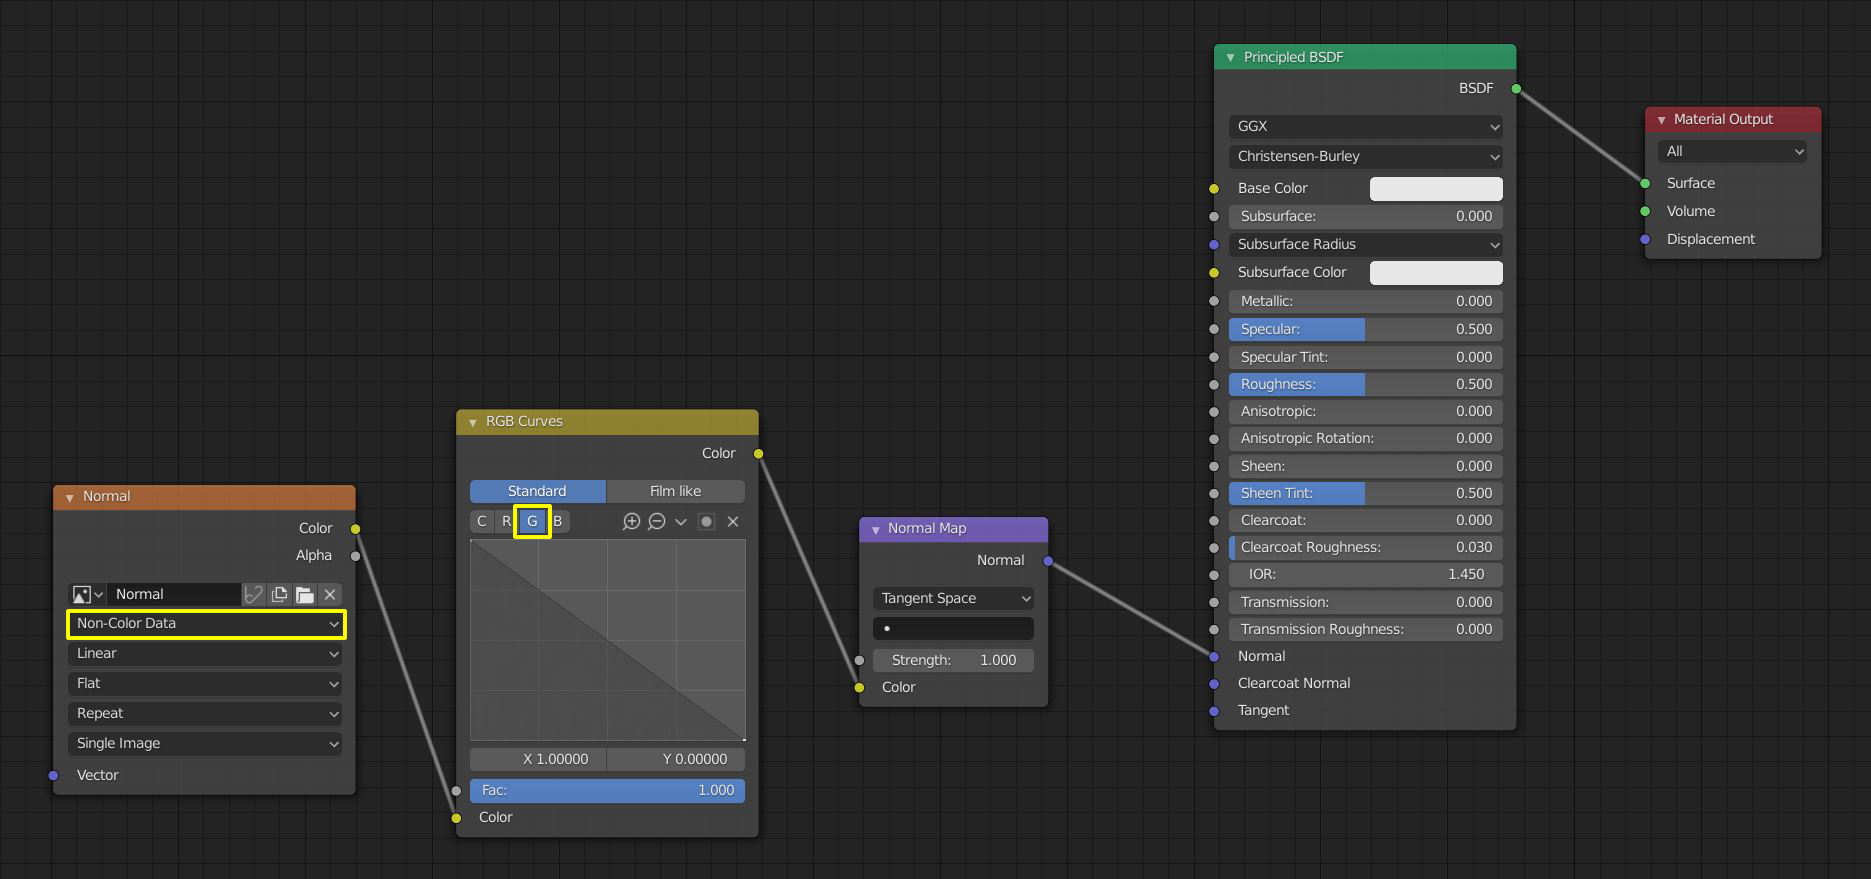
Theoretically, you can use a normal map in combination with a height map. I recommend only using one of them, since in most cases, the effect they create is very similar.
Metallic
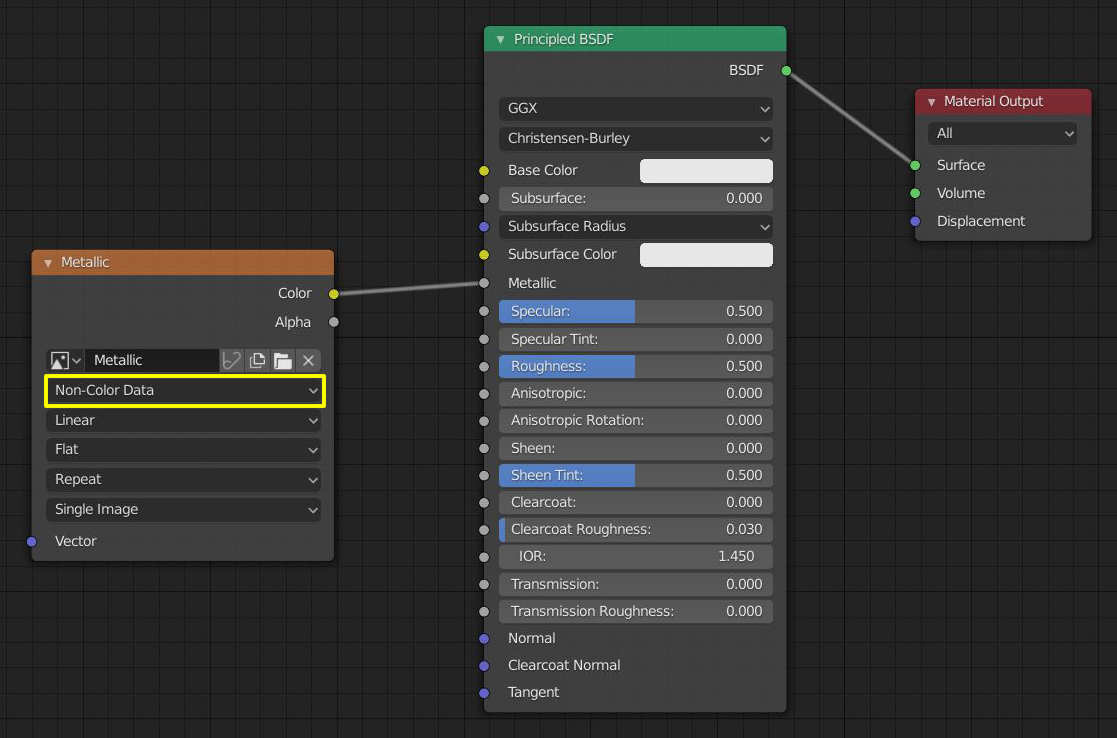
The Metallic map defines which parts of a material are metallic, and which are not. It should be plugged into the Metallic input of the Principled BSDF. Make sure the image file’s color space is set to Non-Color Data. Only materials that are both metallic and non-metallic have this map available. If a metallic material doesn’t have this map, change the metallic value in the Principled BSDF to 1.
Ambient Occlusion
The Ambient Occlusion (AO) map can be used to fake soft shadowing in the bumps of a surface. It isn’t really needed to create realistic materials in Blender (especially with Cycles), but you can still use it to darken the tiny shadows in the surface.
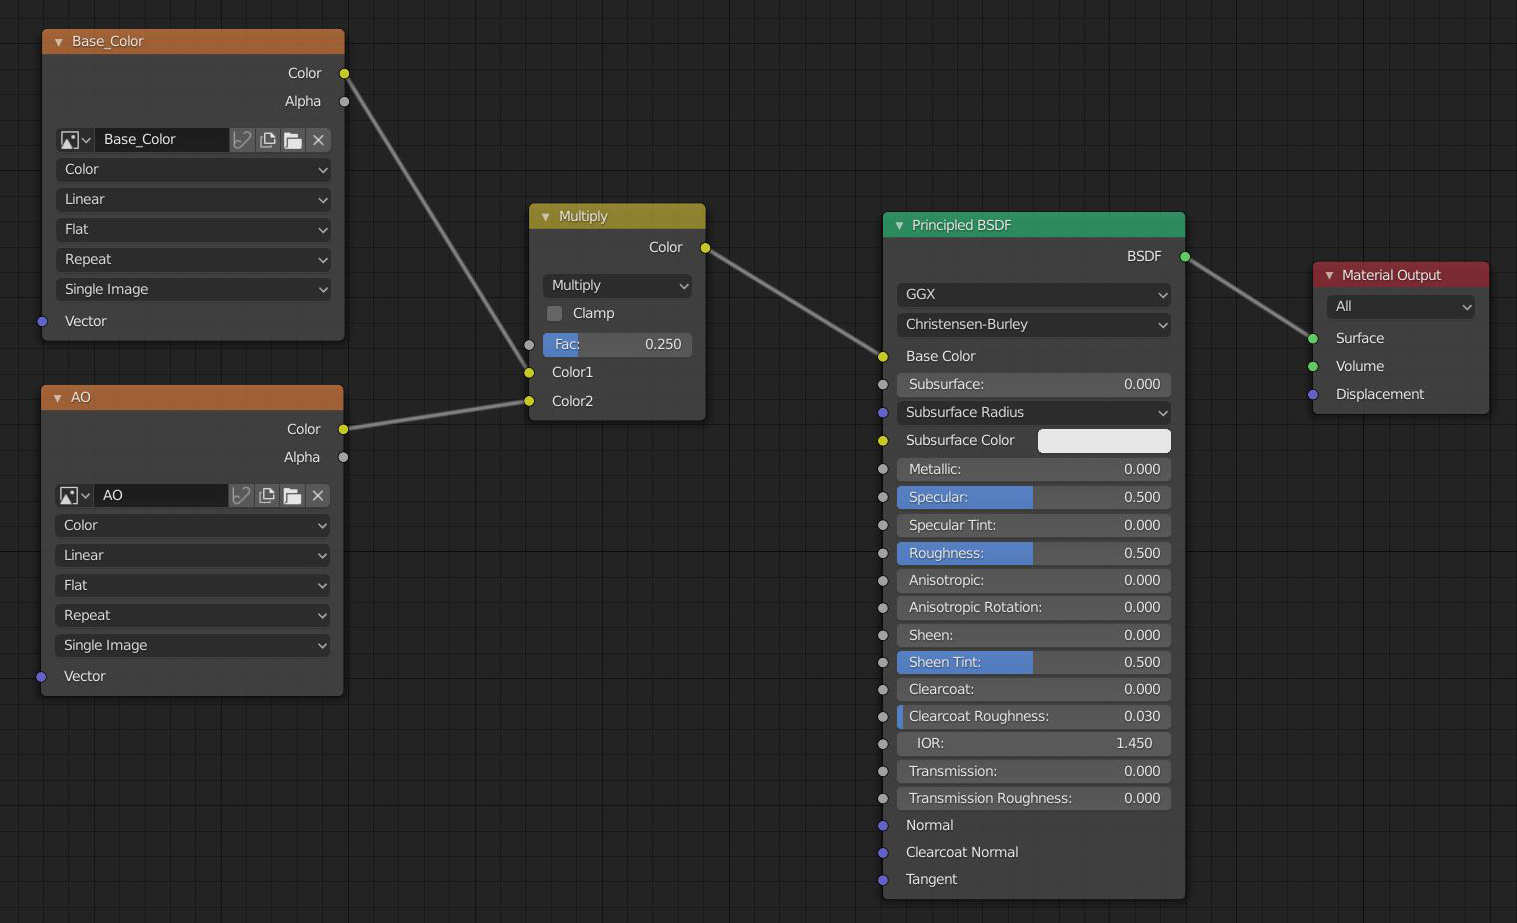
If you want to use this map, it should be multiplied from the Base Color map using a MixRGB node, with the Ambient Occlusion map being the second color input, so you can easily control the strength of it with the slider of the MixRGB node.
Leaves
I’m just using a plane as the 3D model for the leaf, but you can also create a more complex one that follows the form of the leaf. Make sure your object is UV unwrapped before following the instructions below.
Basic Setup
Import the Base Color, Roughness and Normal map from the front of the leaf the way you learned it in the previous guide.
Use Opacity
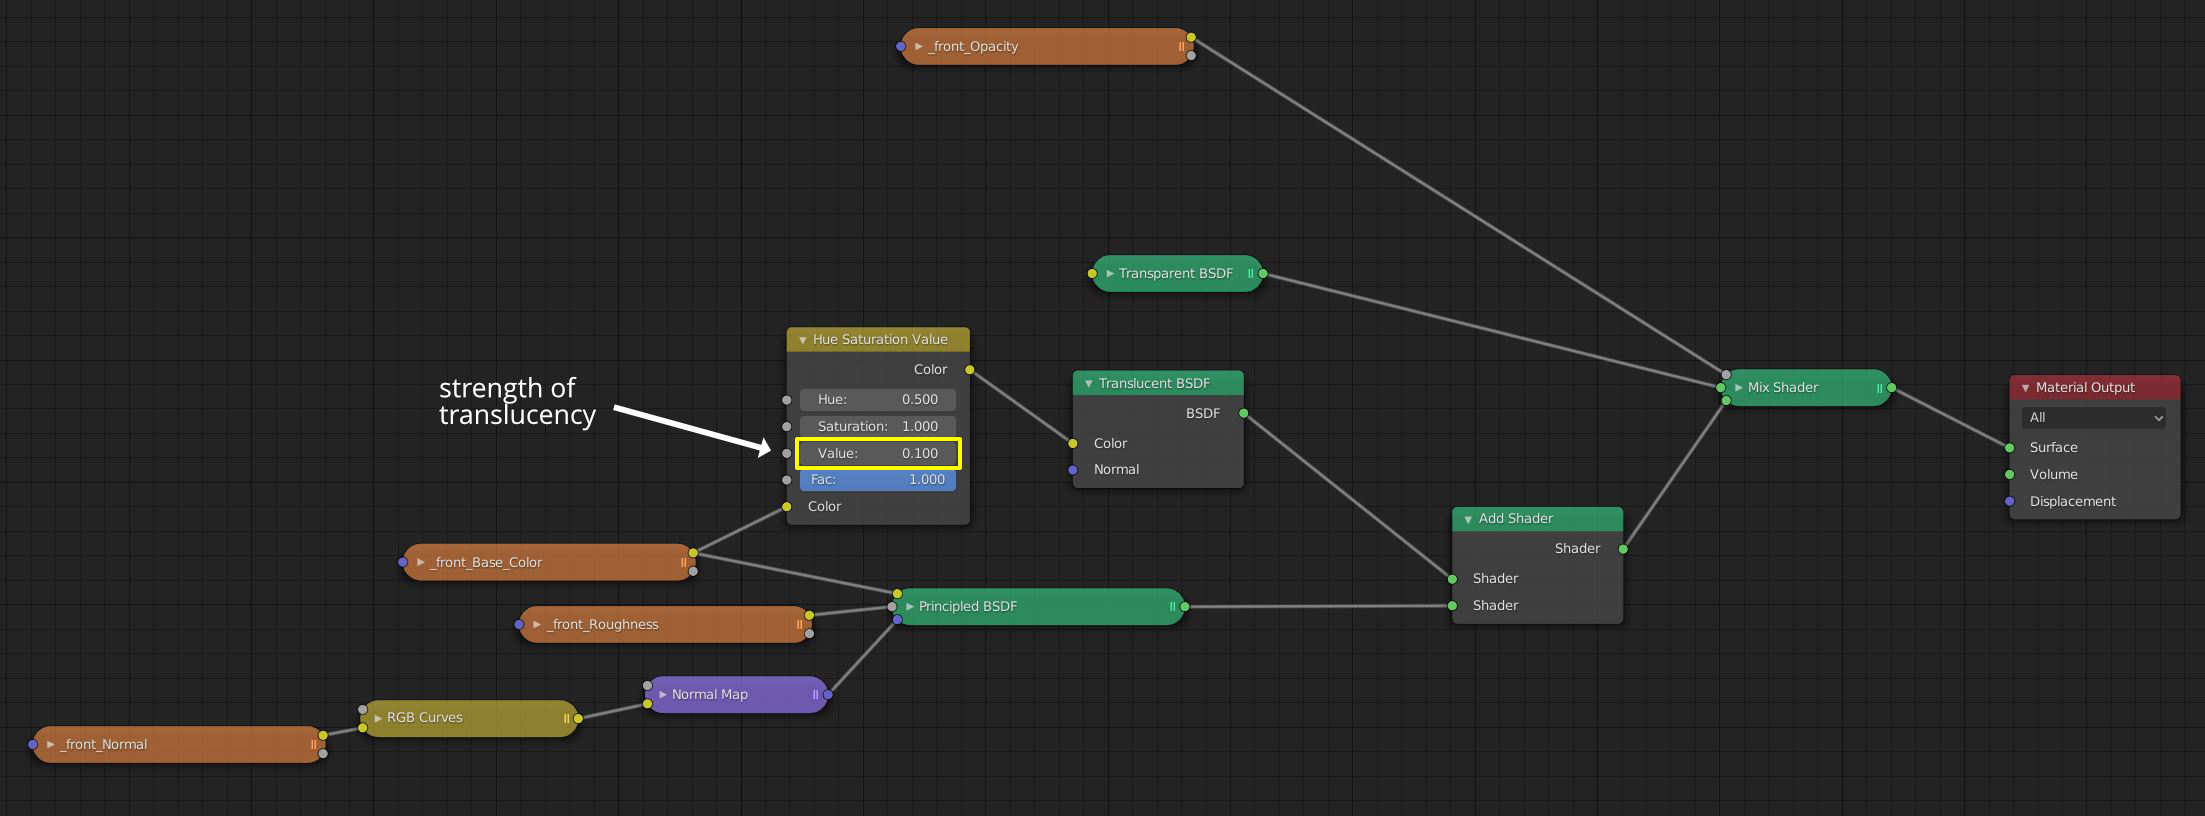
Mix the Principled BSDF with a Transparent BSDF and use the Opacity map as the factor of the Mix Shader. Make sure the Principled BSDF is plugged into the bottom Shader input of the Mix Shader, and the Transparent BSDF into the top.

Add Translucency
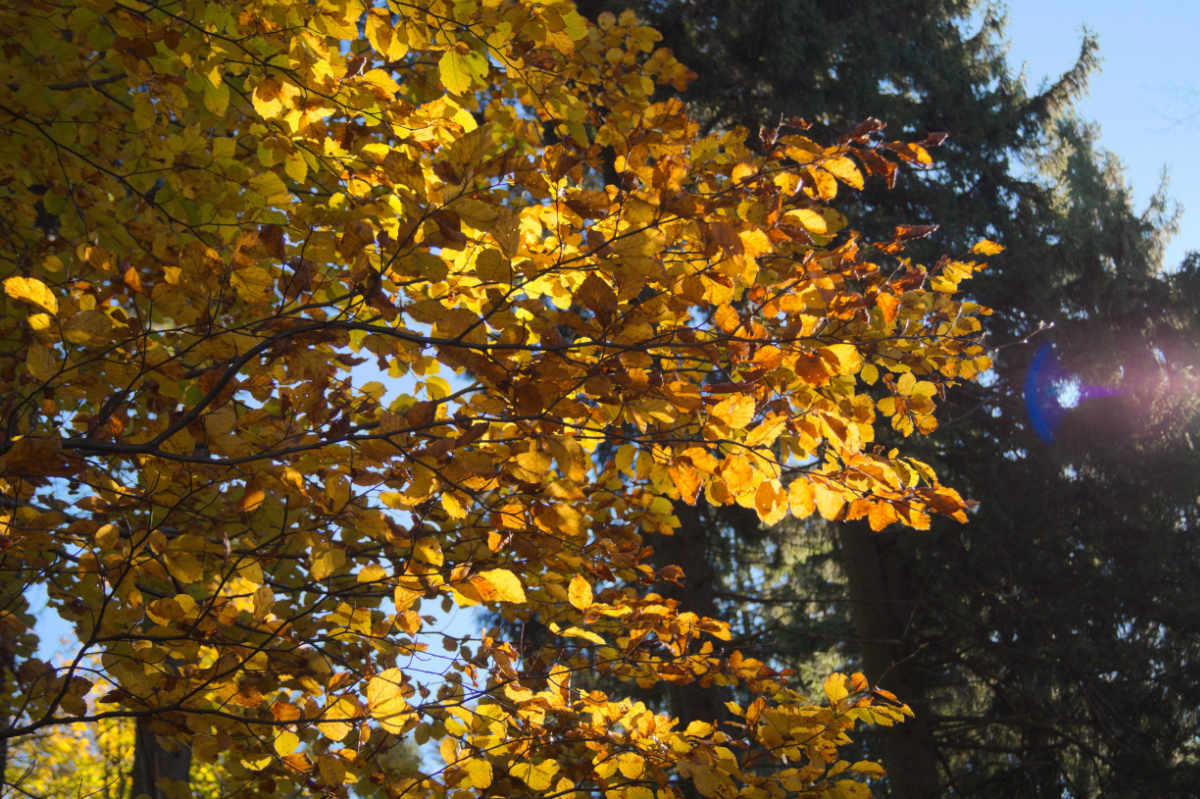
Translucency is when light passes through a leaf. It creates this glowing effect that you see when leaves are lit from behind:
In Blender, we can achieve this effect using the Translucent BSDF. Combine it with the Principled BSDF using the Add Shader node, and connect the Base Color map to the color of the Translucent BSDF. Add a Hue/Saturation node between the Base Color map and the Translucent BSDF. By lowering the value of the Hue/Saturation node, you can lower the strength of the translucency. (A value between 0.010 and 0.200 usually works best for me.)
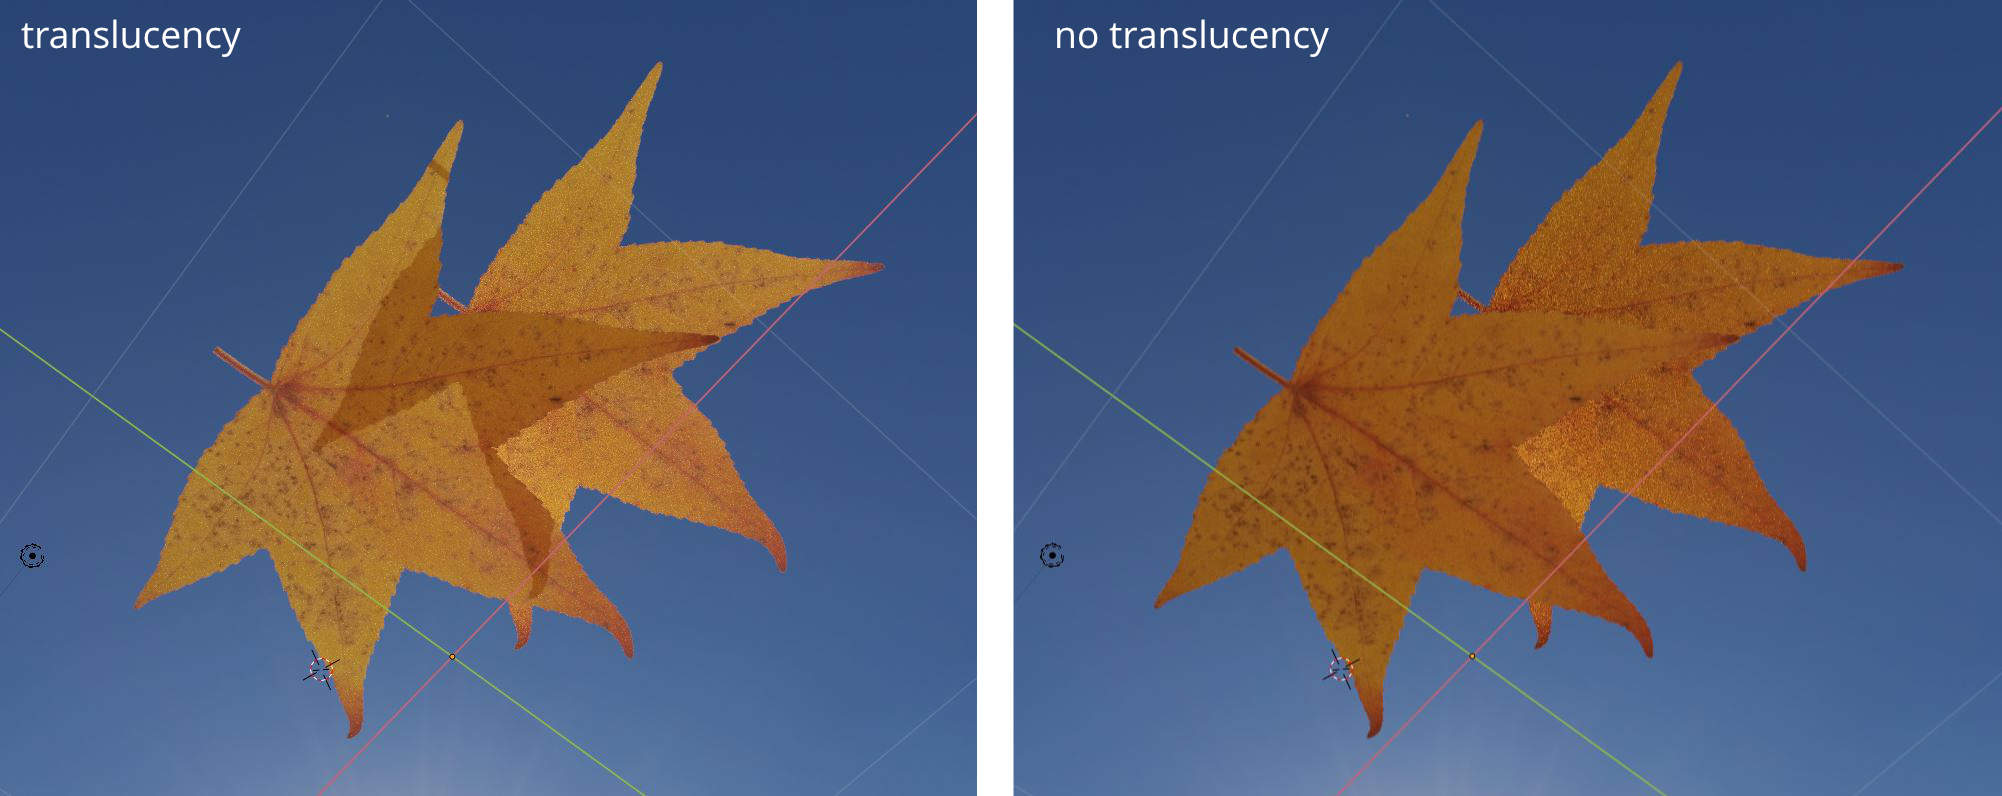
Translucency helps make the leaf look thinner.
Double-sided Leaves
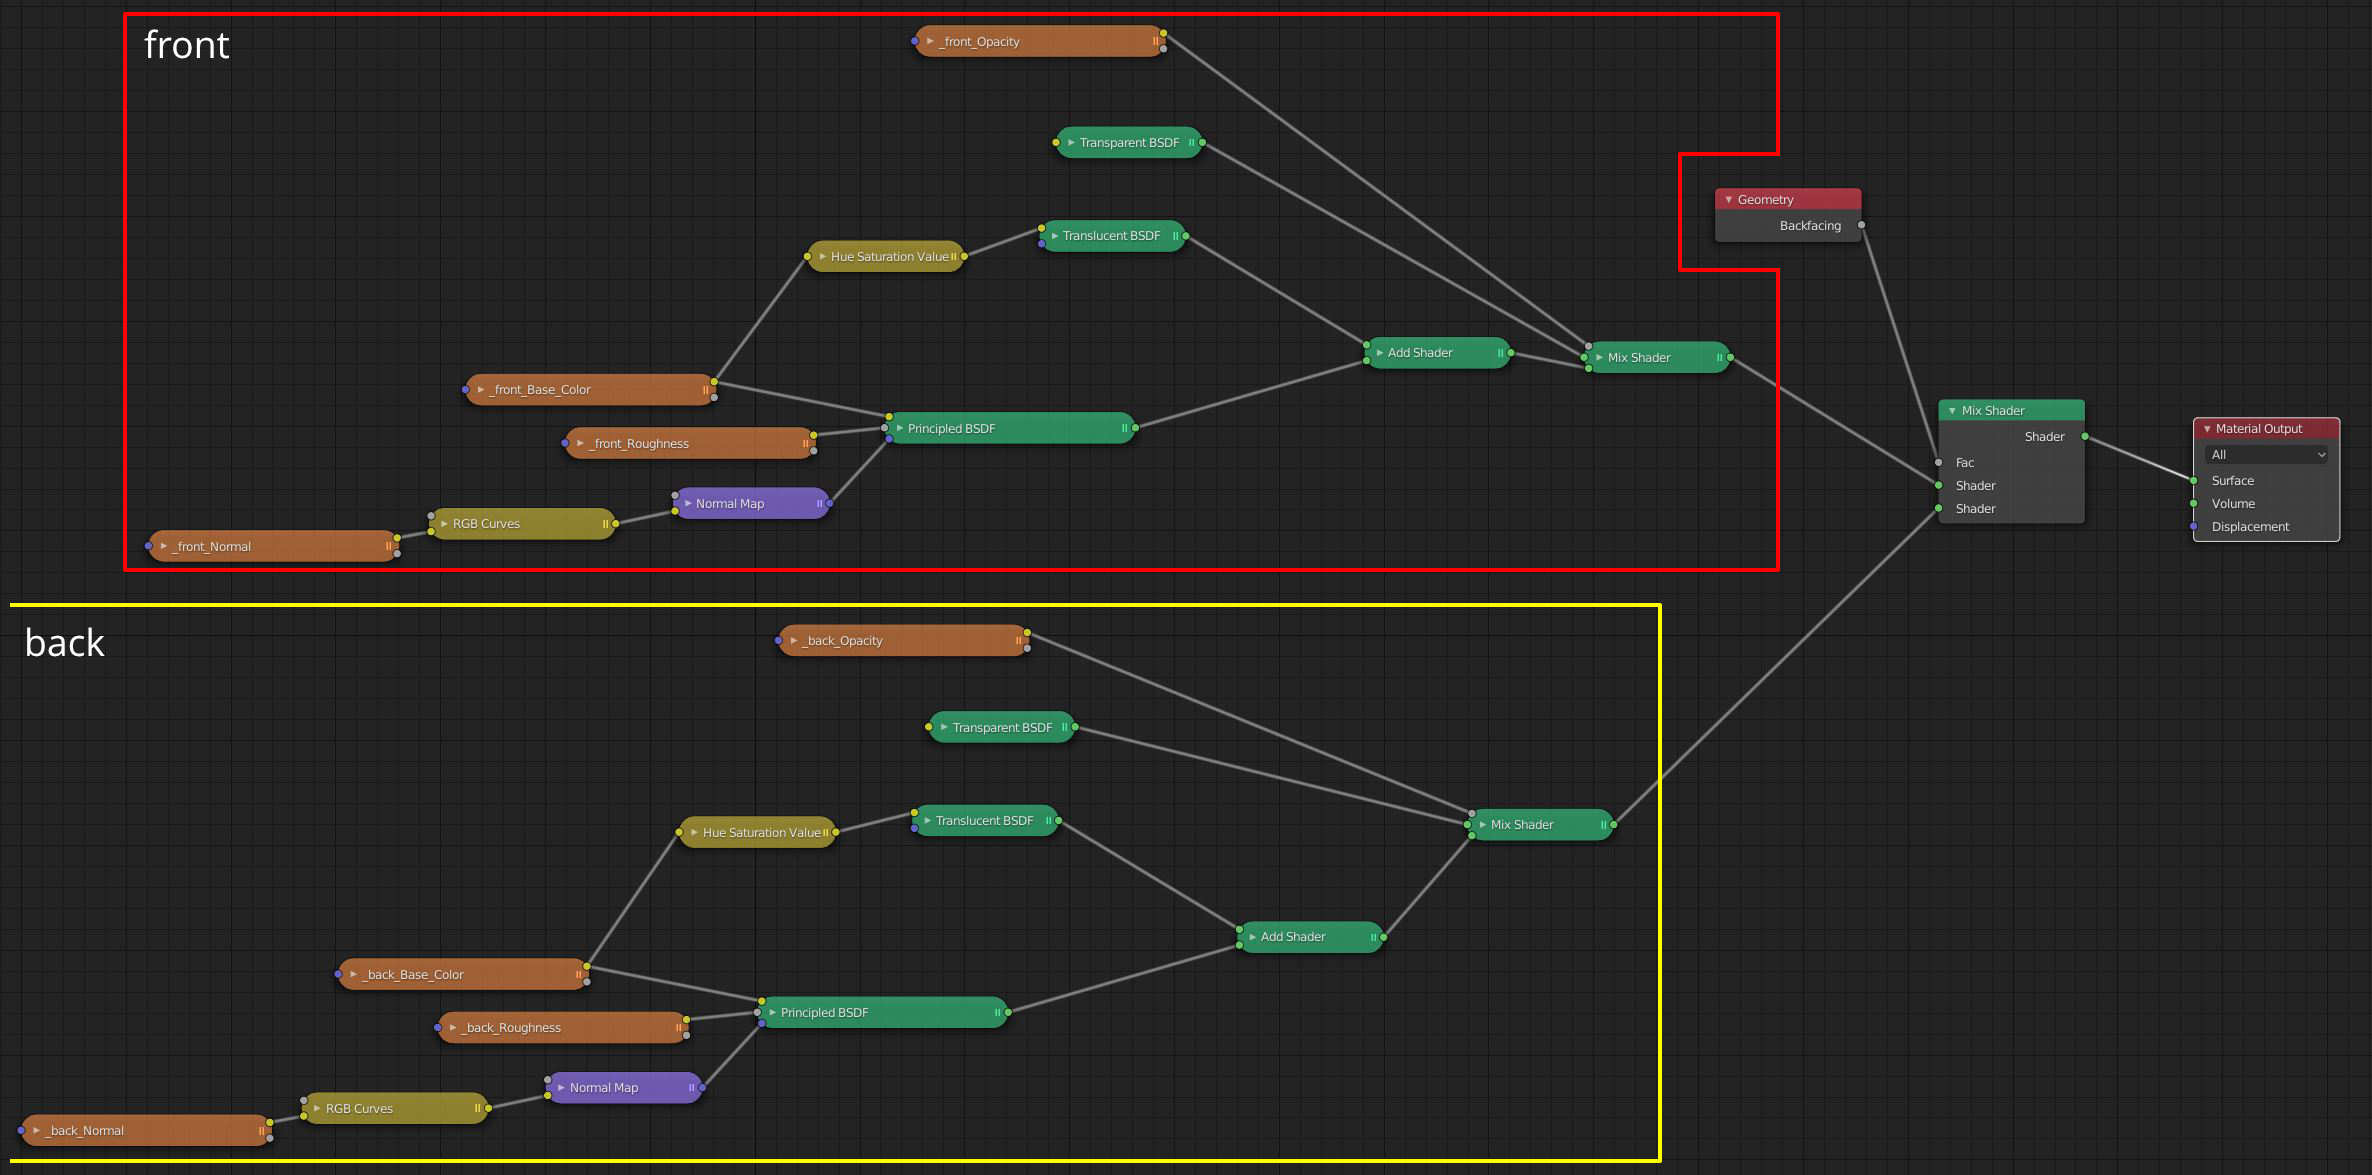
Most leaf textures on cgbookcase.com come with the back side of the leaf as well. If you want to make a double sided leaf, duplicate your entire node setup, change the image files of your copy to the ‘_back’ files and mix them together using the Backfacing output of a Geometry node. This way, the leaf will use different textures when viewing it from to front or back.
Surface Imperfections
Surface imperfections are great to add detail to a material, which can make a render look much more realistic. Make sure your object is UV unwrapped before following the instructions below.
Smudges and Fingerprints
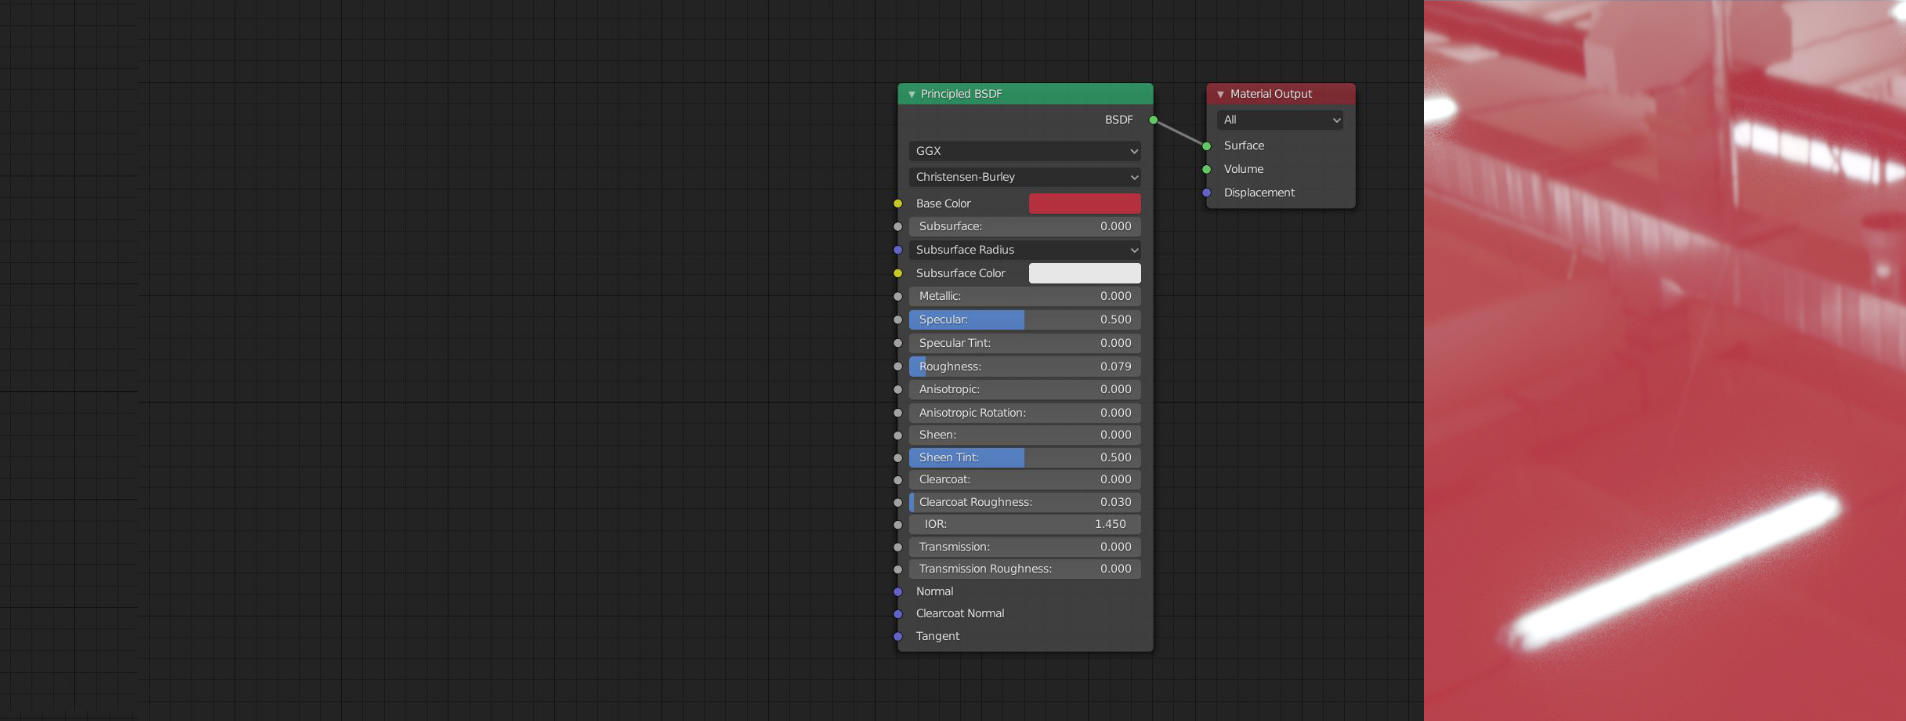
Smudges and fingerprint textures work best on glossy surfaces. In this example, I’m using a shiny, red material, but you can use any material you want.
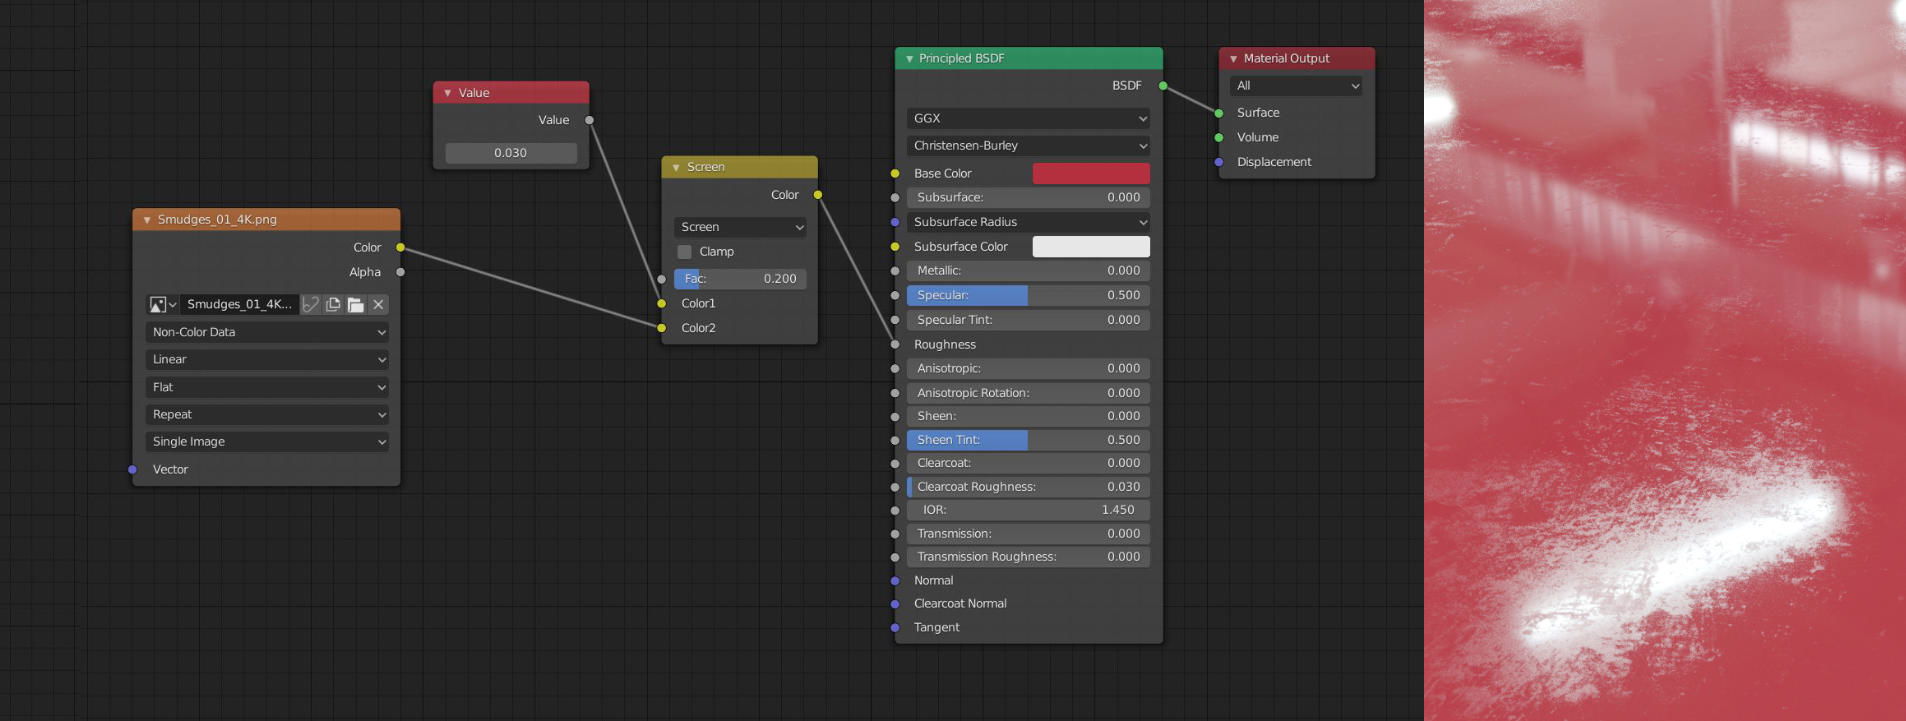
Import the texture and make sure it’s color space is set to Non-Color Data. Mix it with the roughness of the material (this can either be a single value or a roughness map). Set the blend mode to screen. If you’ve plugged the surface imperfection texture into the bottom color slot, you can control the strength of the effect by using the factor (Fac.) slider of the MixRGB node.
Water Droplets
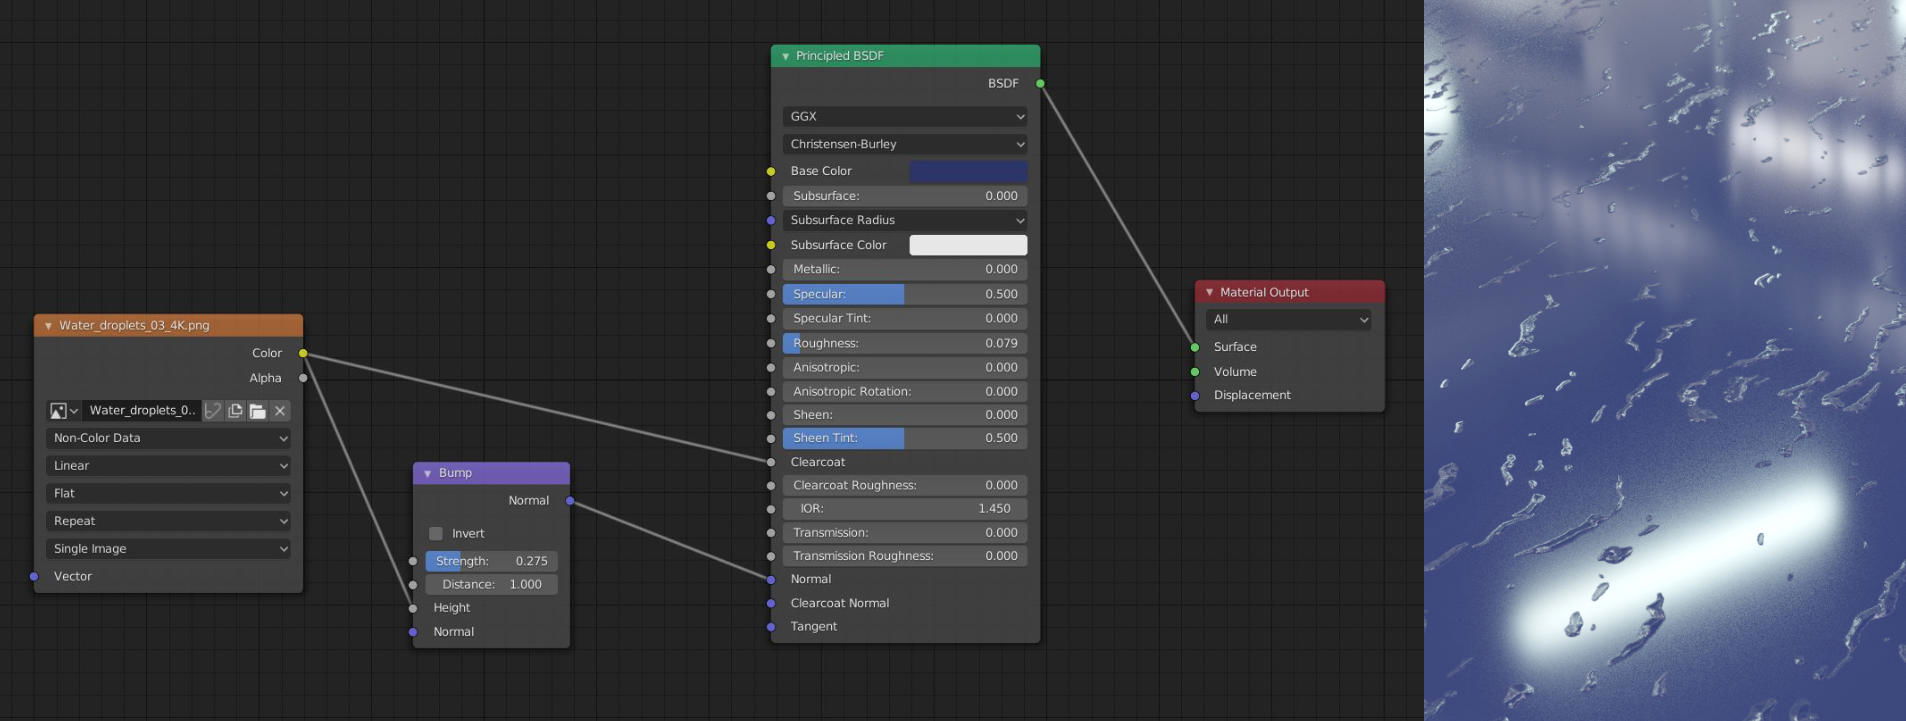
By using the water droplets textures you can make a material look like it got wet in the rain (i. e. windshields). I’m using a shiny, blue material for demonstration purposes.
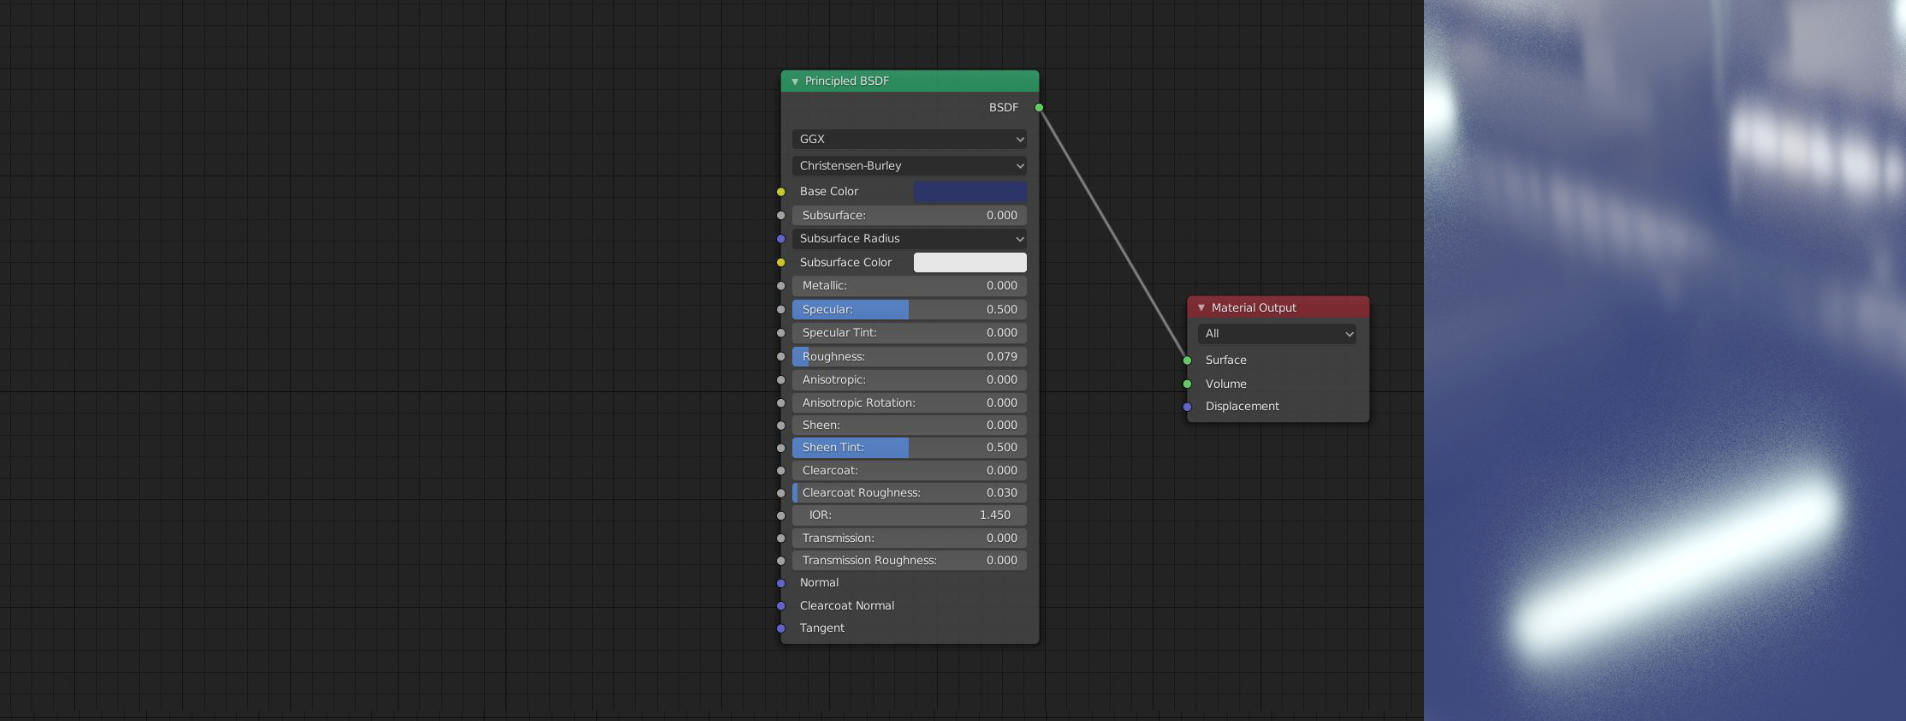
Import the texture and make sure it’s color space is set to Non-Color Data. To make the water droplets look 3D, connect the texture to a Bump node, which then should be plugged into the Normal input of the Principled BSDF. Then, connect the texture to the Clearcoat of the Principled BSDF. The Clearcoat adds a white specular layer on top of the material, which makes it look like the droplets were on top of the blue material. Set the Clearcoat Roughness (= the water droplets’ roughness) to 0.
