Immersion VR Substance Designer Material Breakdowns
Over the last few months, I designed and programmed an interactive building for virtual reality. Below you can see breakdowns of the Substance Designer graphs of two different PBR materials I created during this project.
If you'd like to know more about the project, feel free to watch the demo video.
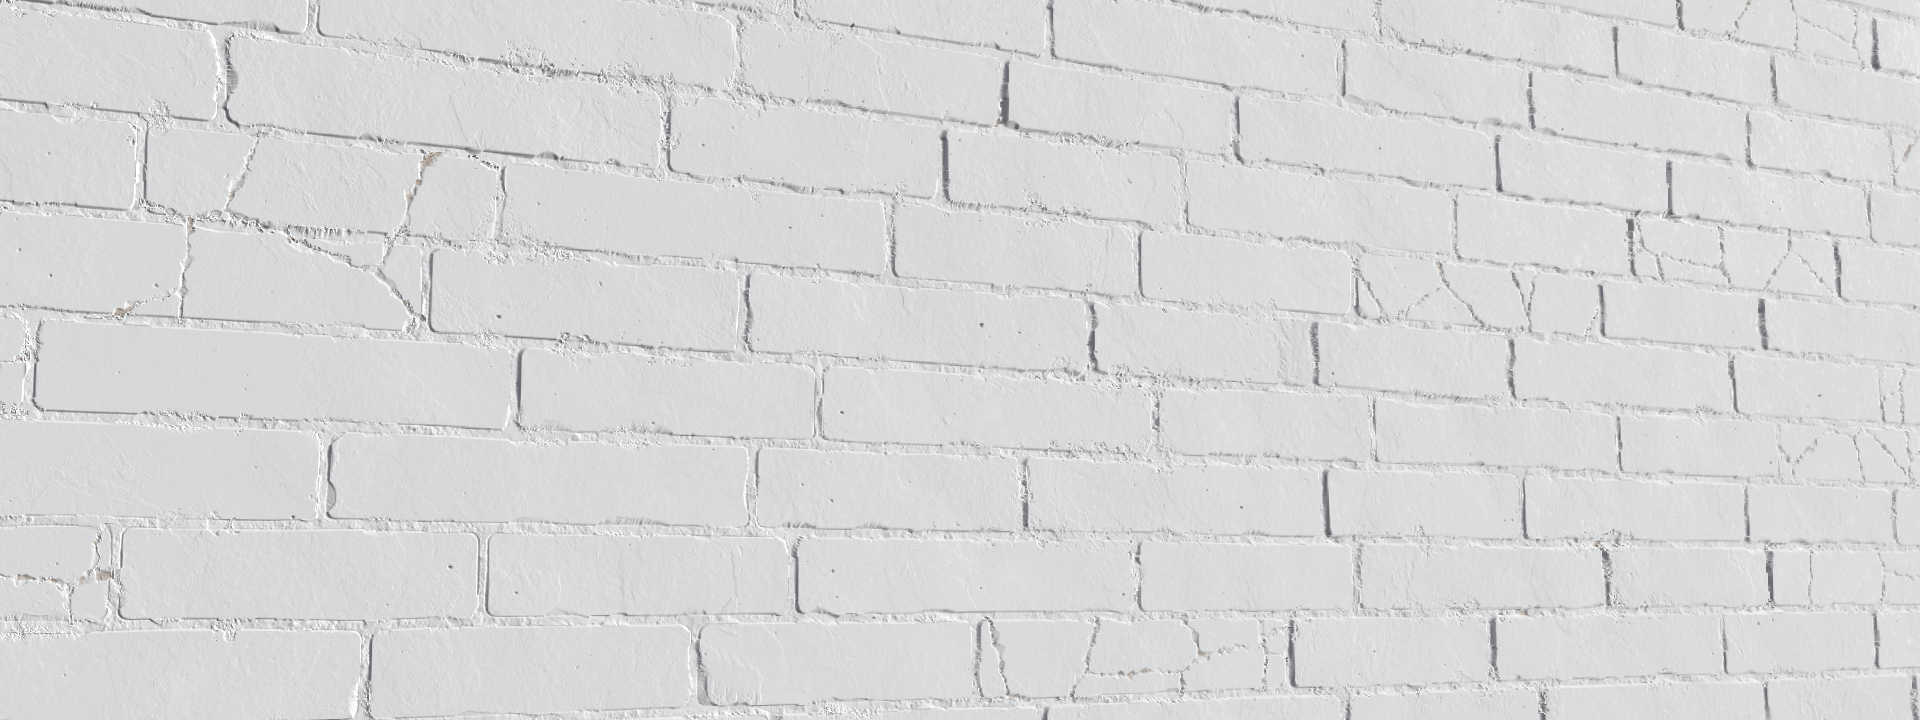
White Brick Wall 01
The first one I'd like to break down is the White Brick Wall 01:
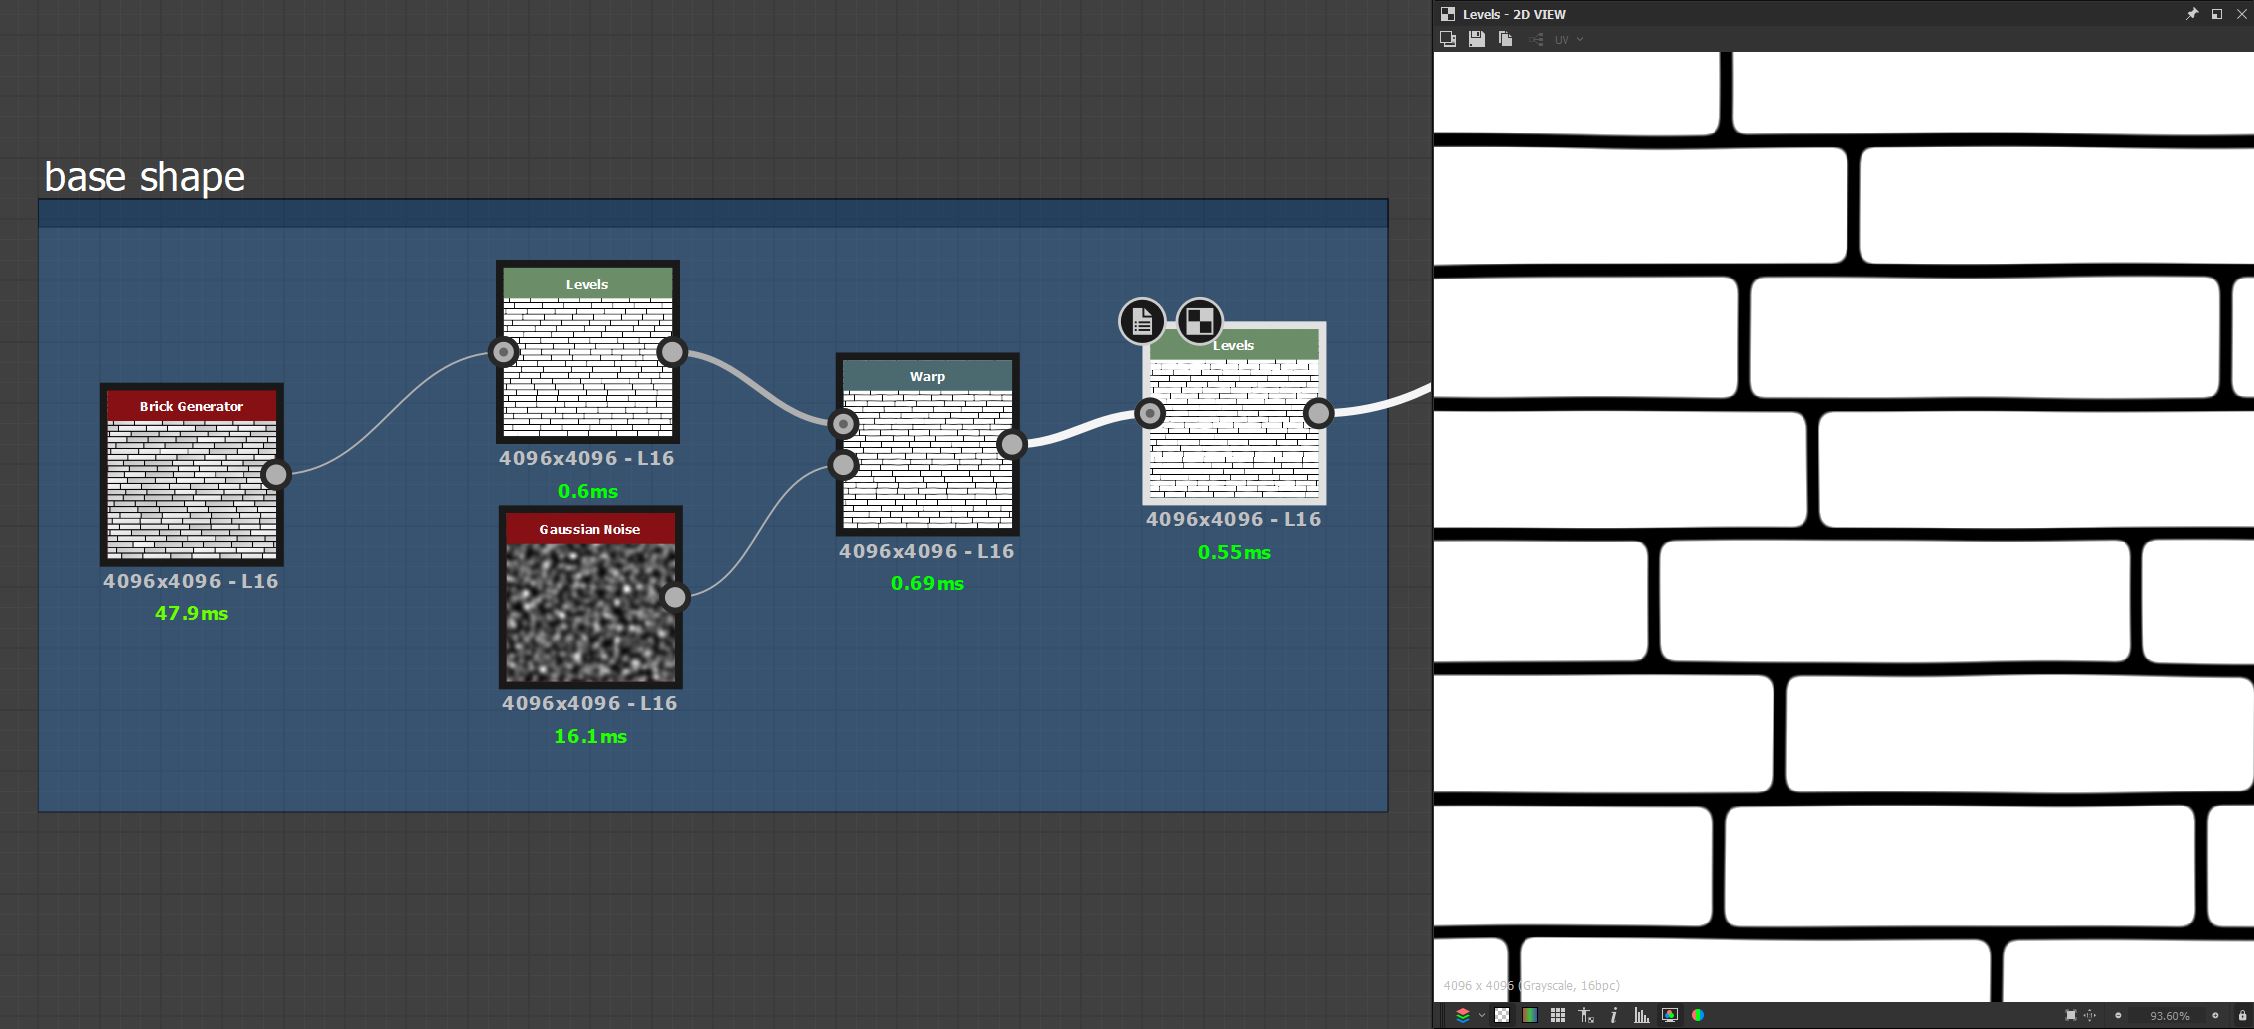
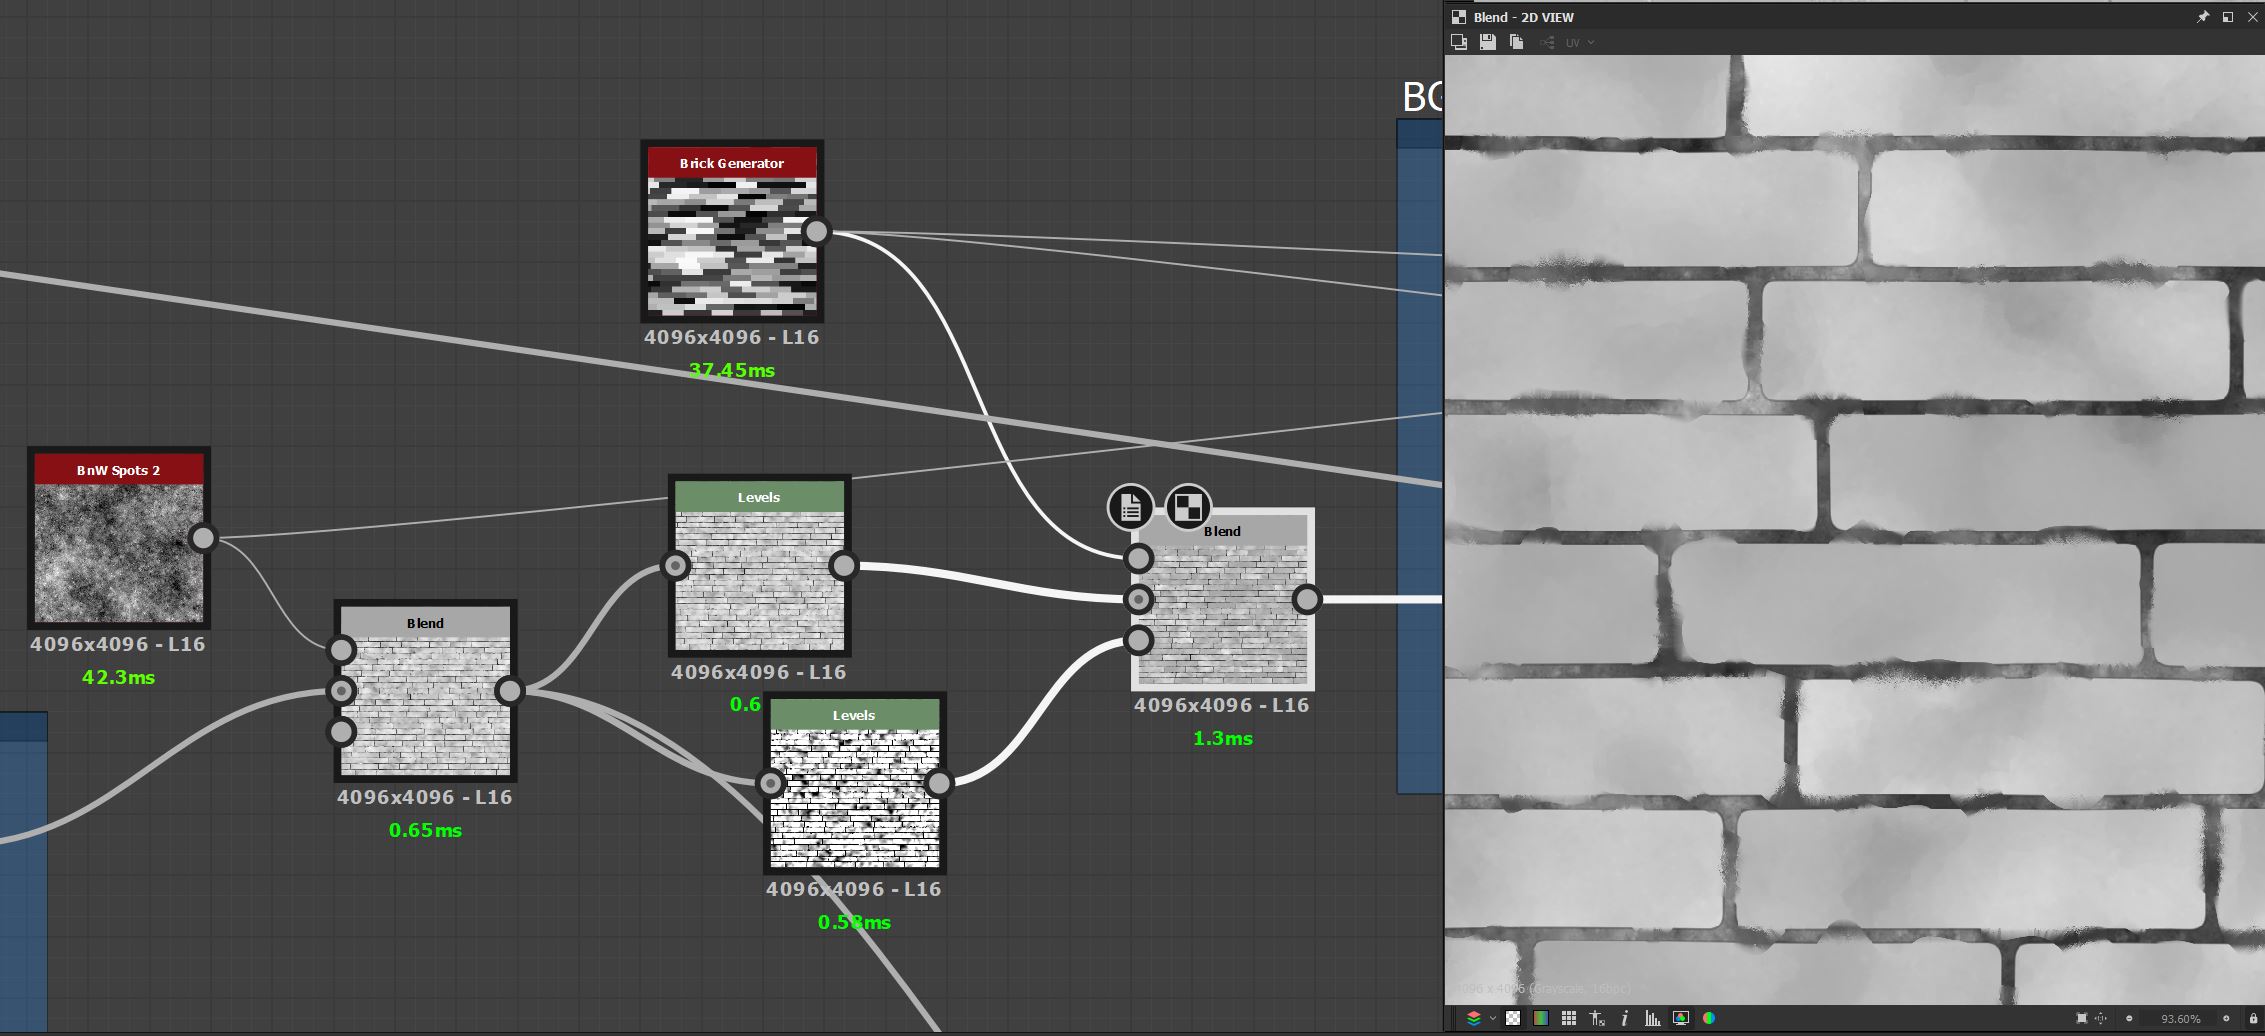
I started with a Brick Generator and then made the brick shapes have less straight-lined edges using the Warp node with a Gaussian Noise as the strength.
Next, I wanted to make the bricks a bit bumpy and less perfect. To do that, I used two layers of noises with different levels of detail which creates some kind of depth and interesting height variation. Here it was important to warp the noises by a different factor for each brick, so they don't look like they've just been overlayed over the entire texture, which was achieved using the Directional Warp node and another Brick Generator where every brick has a random value.
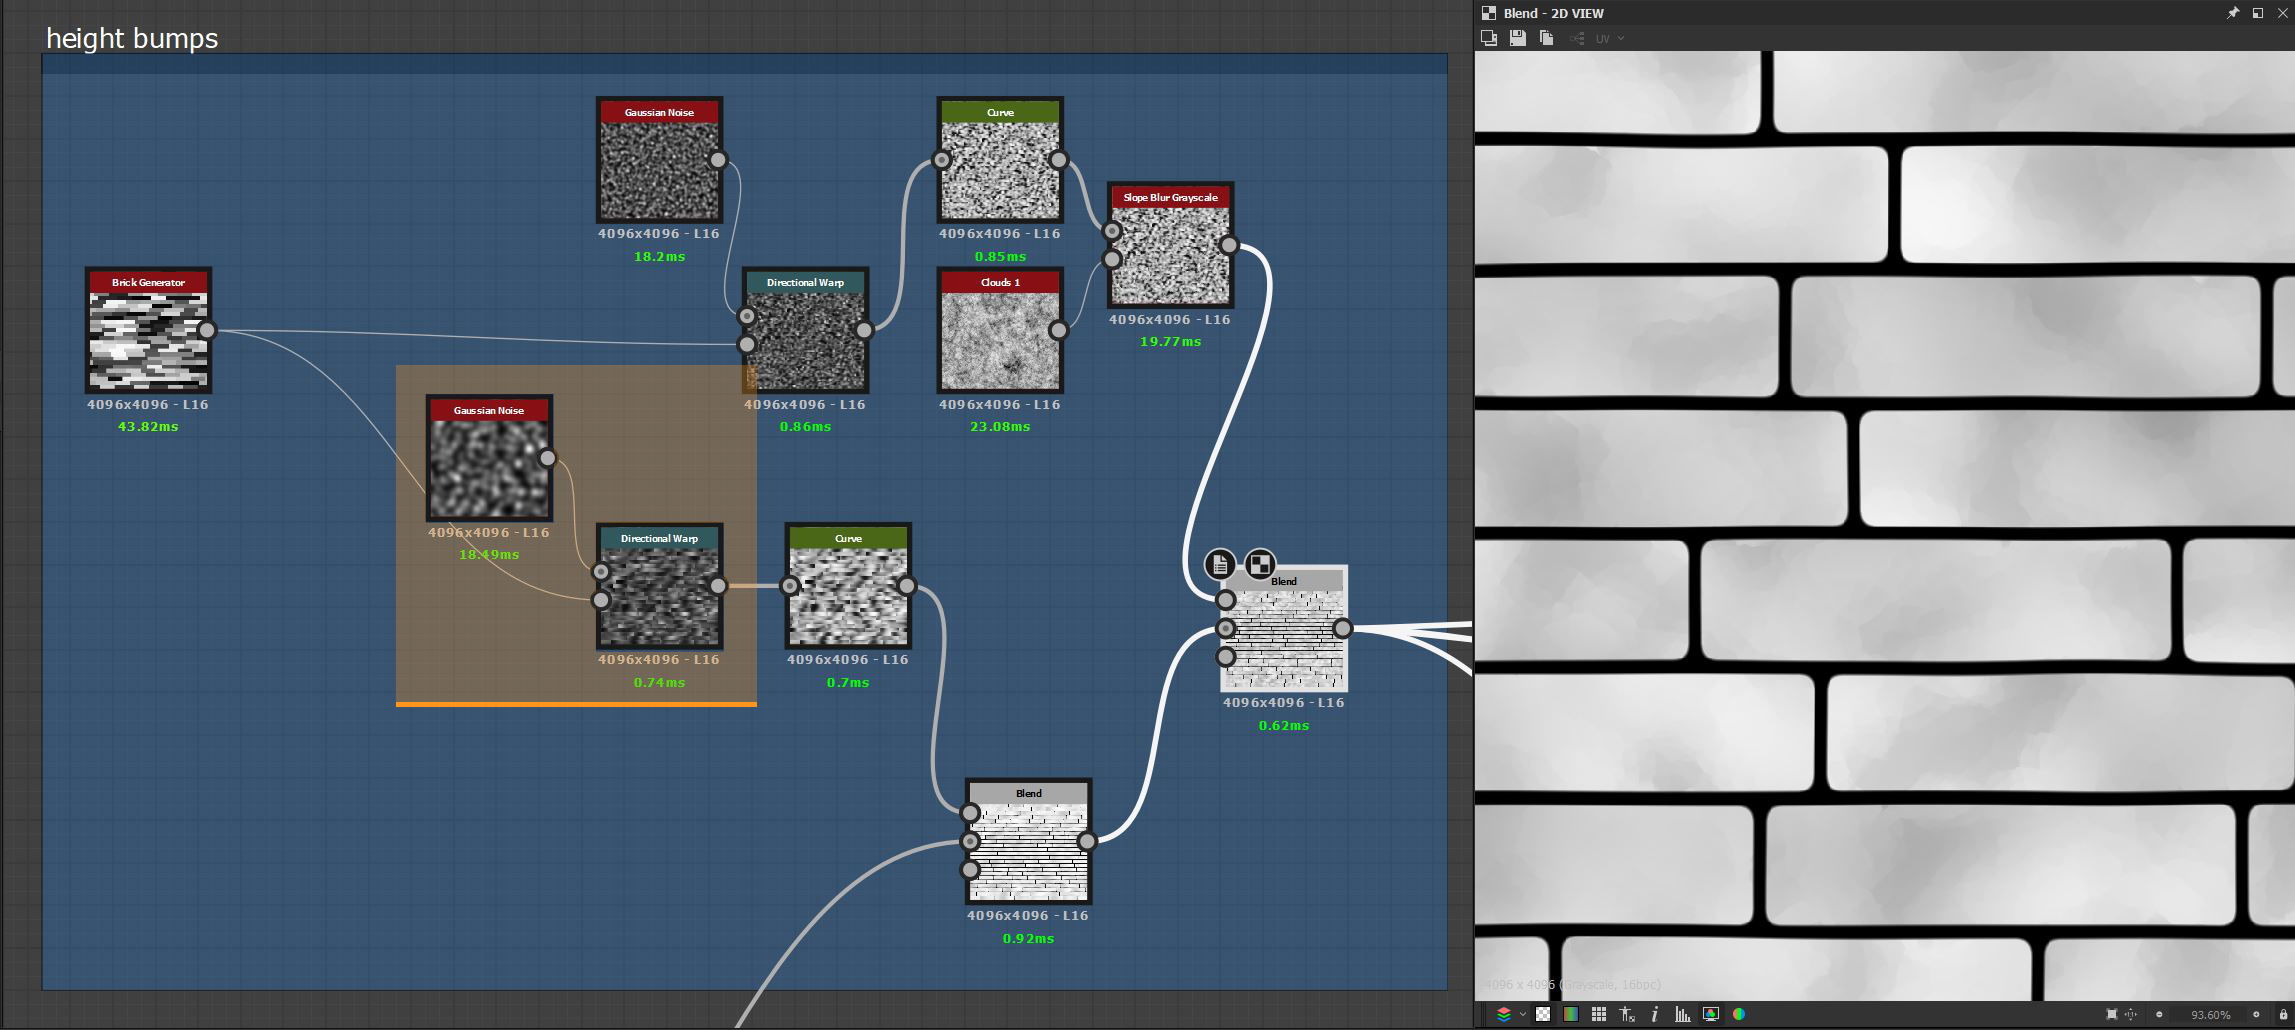
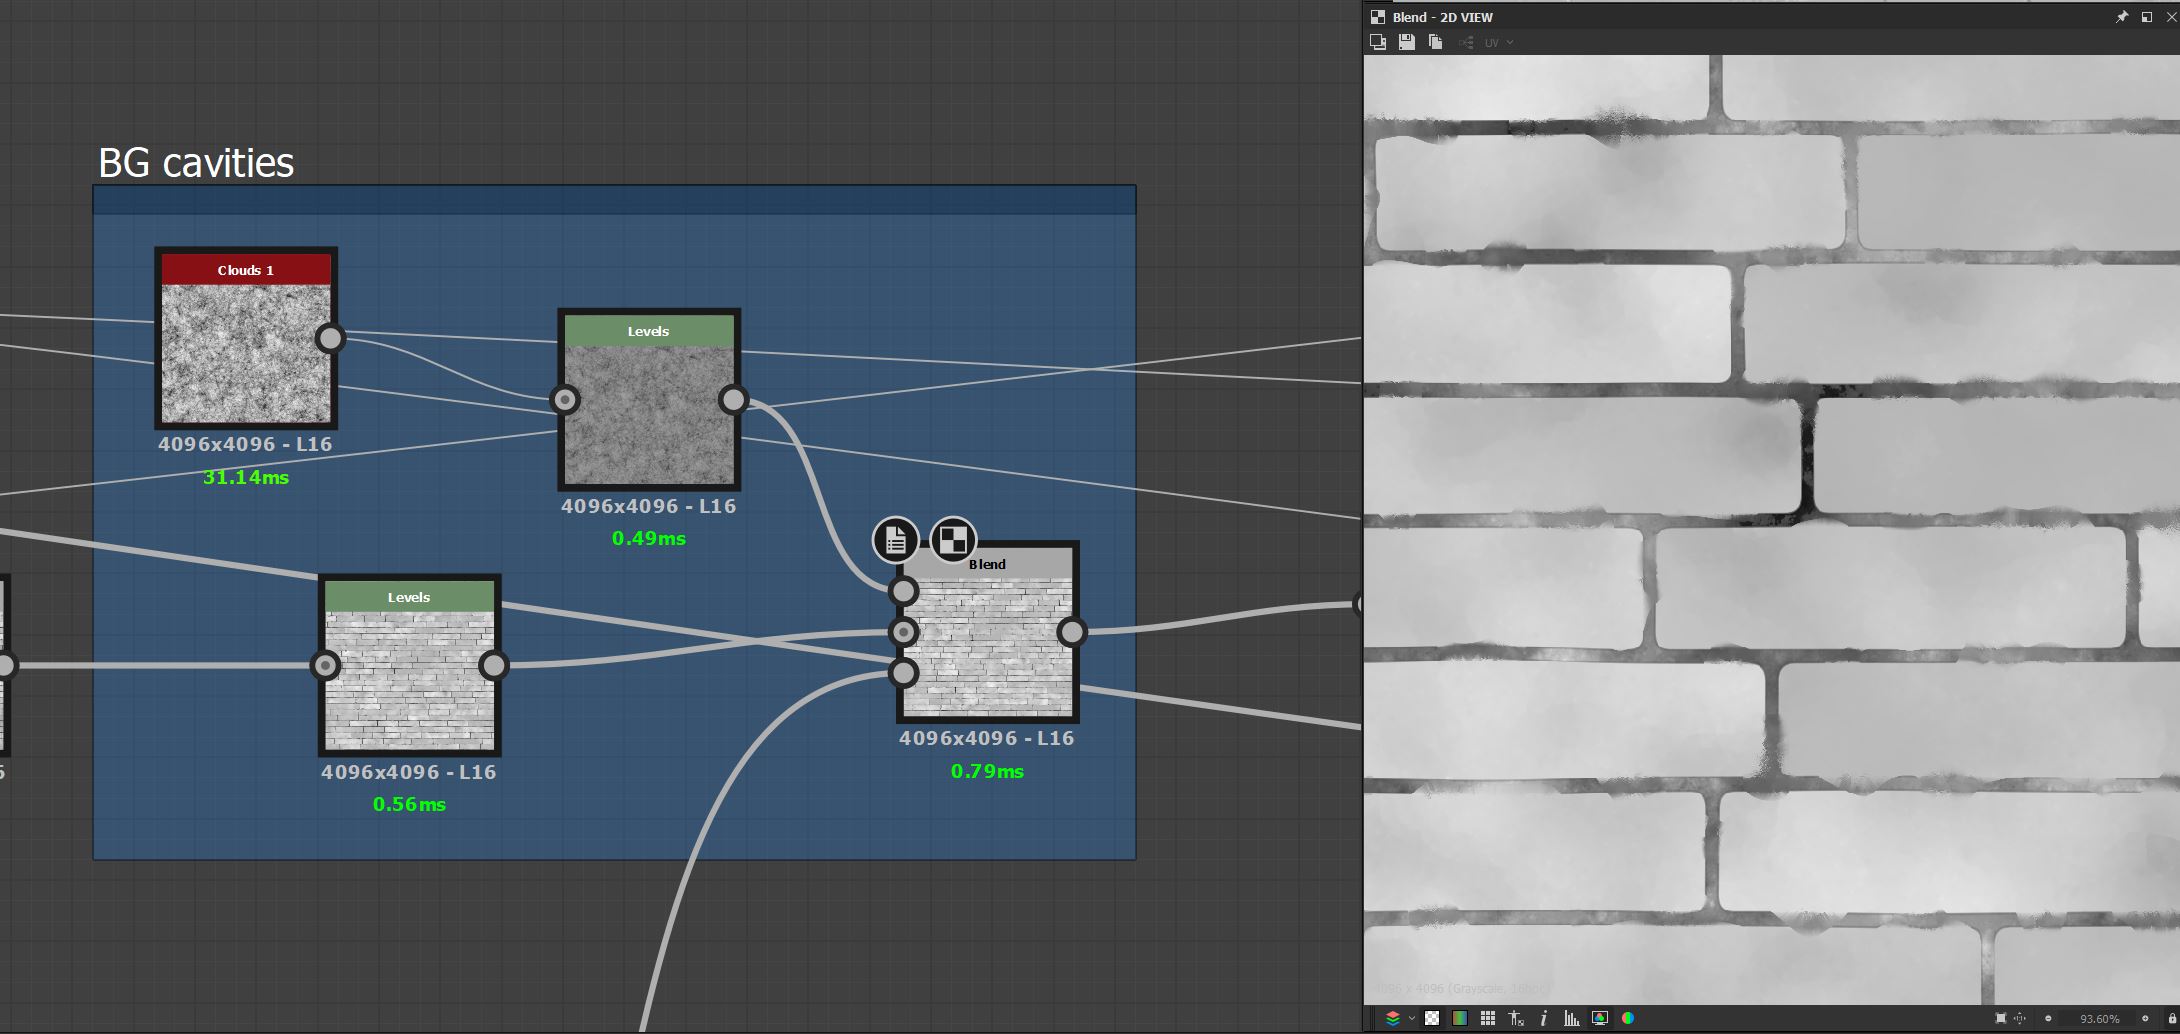
Then, I added some height information to the crevices between the bricks.

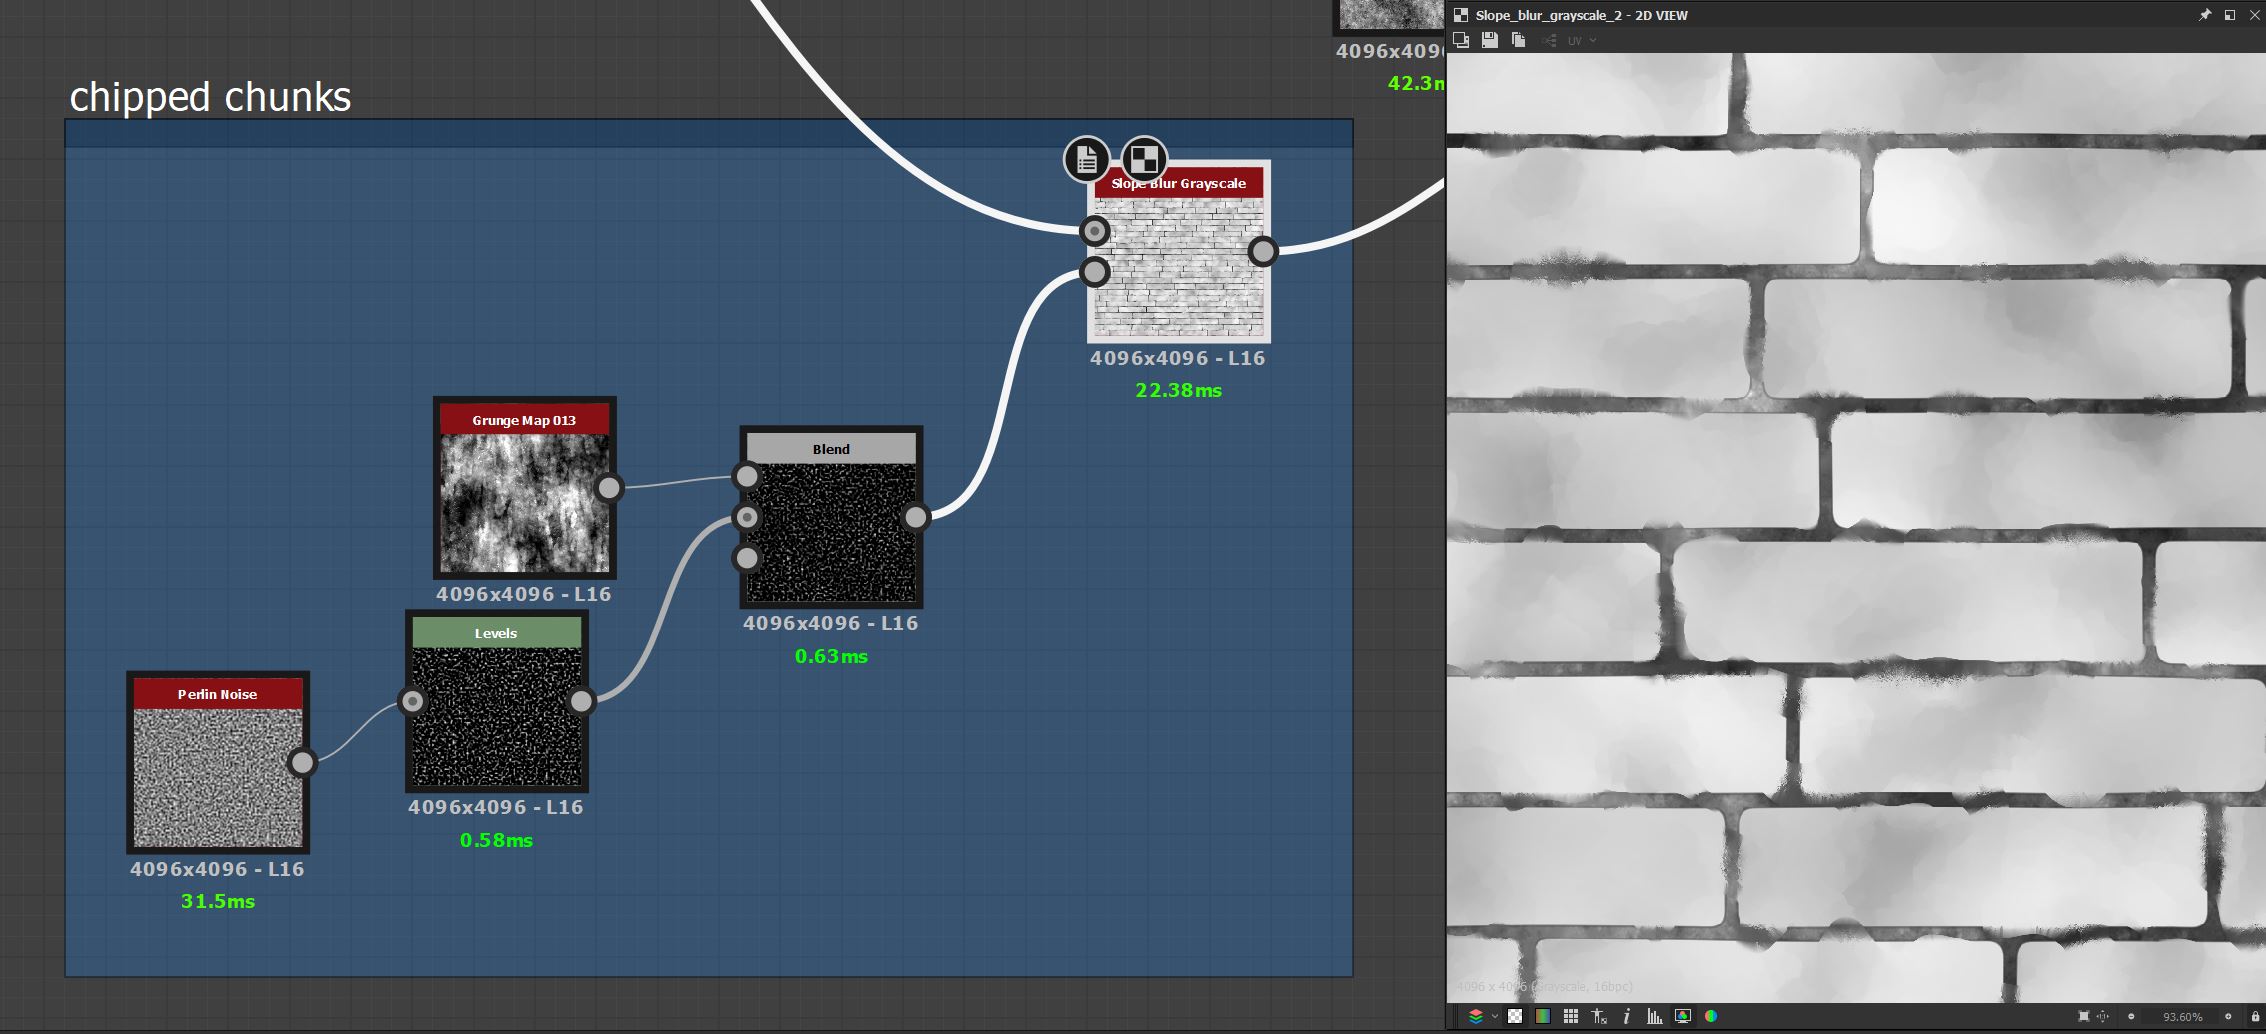
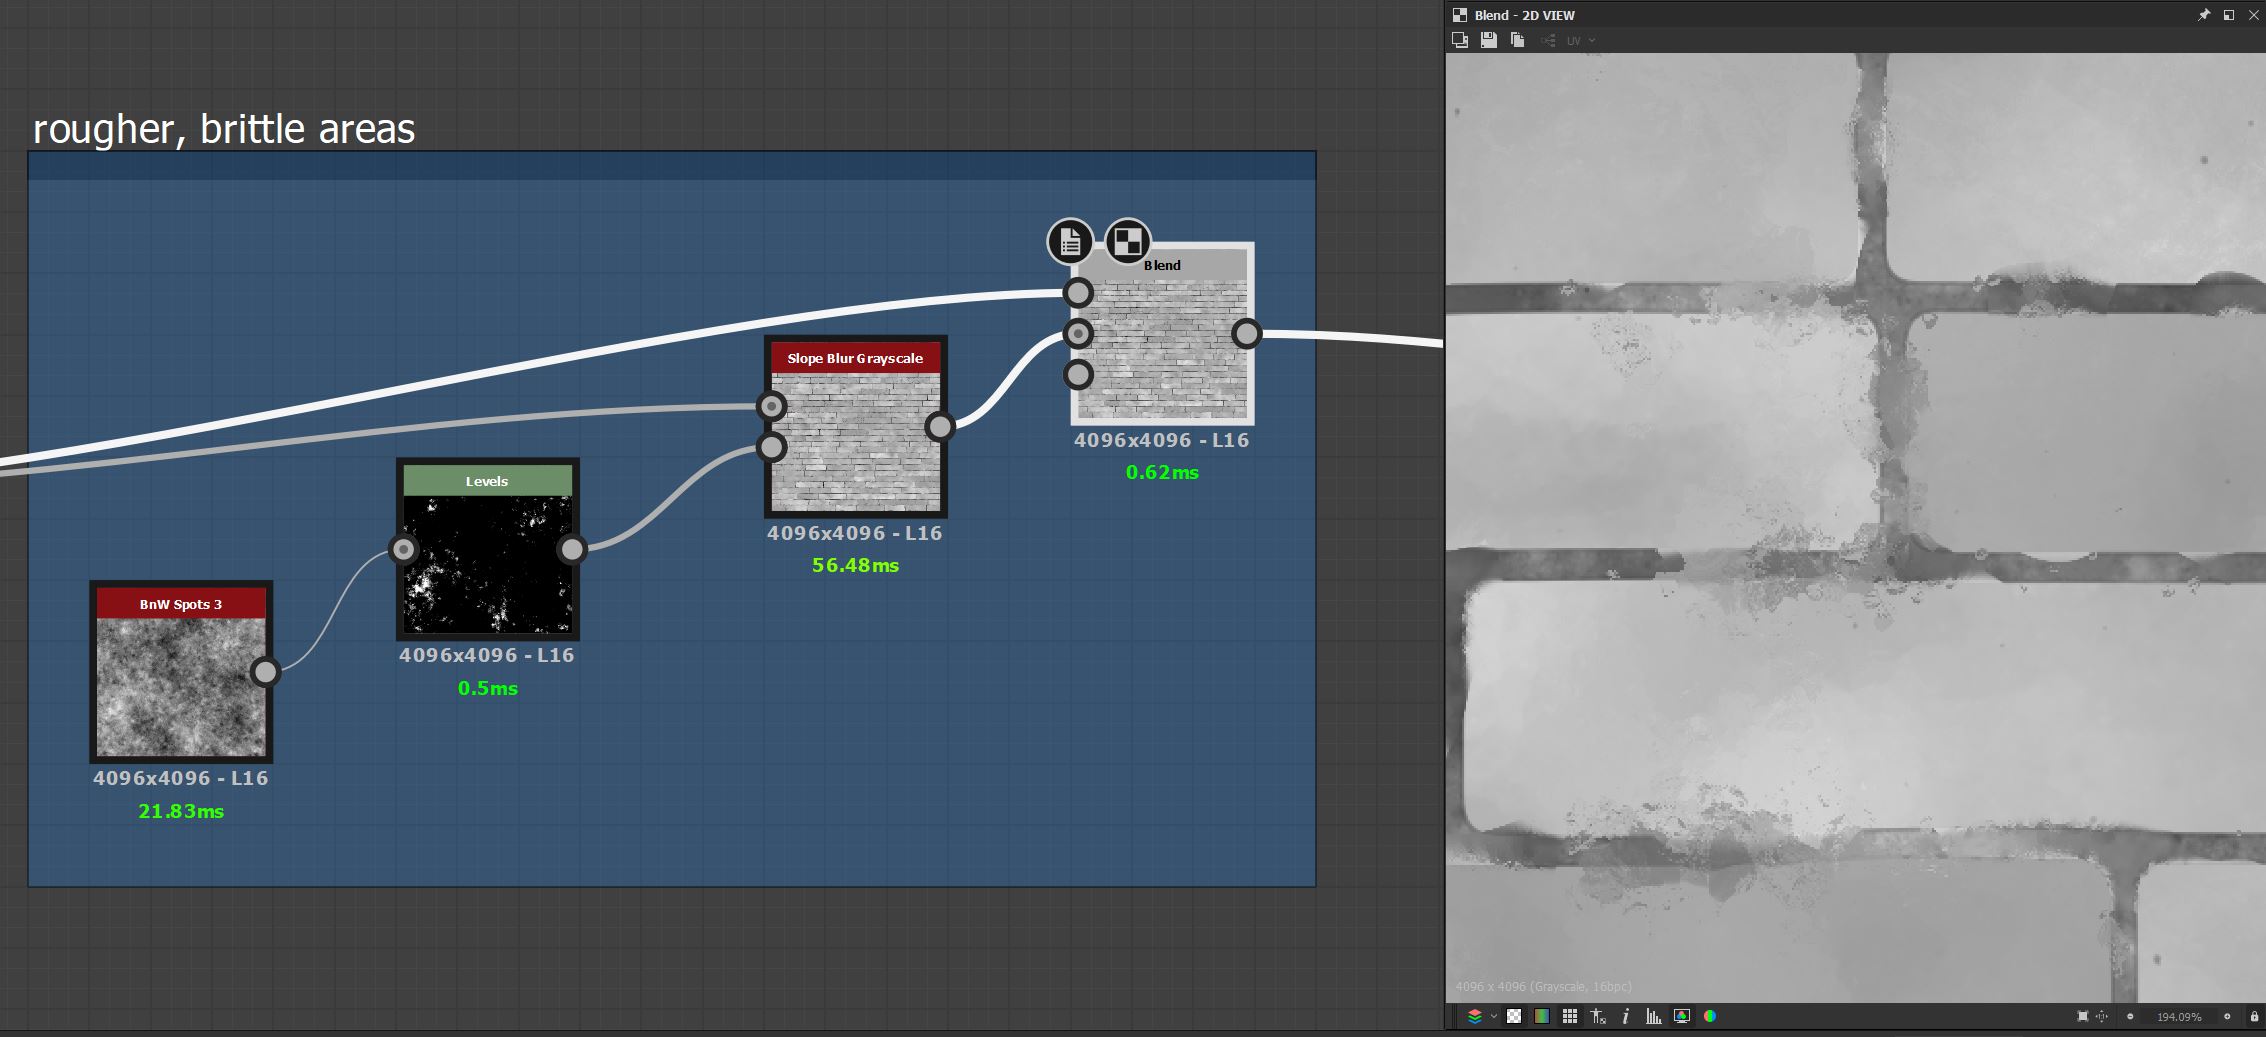
The bricks still look too clean and perfect, so I tried to add some kind of slightly damaged type of look to the edges of the bricks.
Next, I added some minute detail to the entire texture to mimic the tiny height bumps painted bricks often have. I also mixed in another Brick Generator to make the bricks have varying heights.
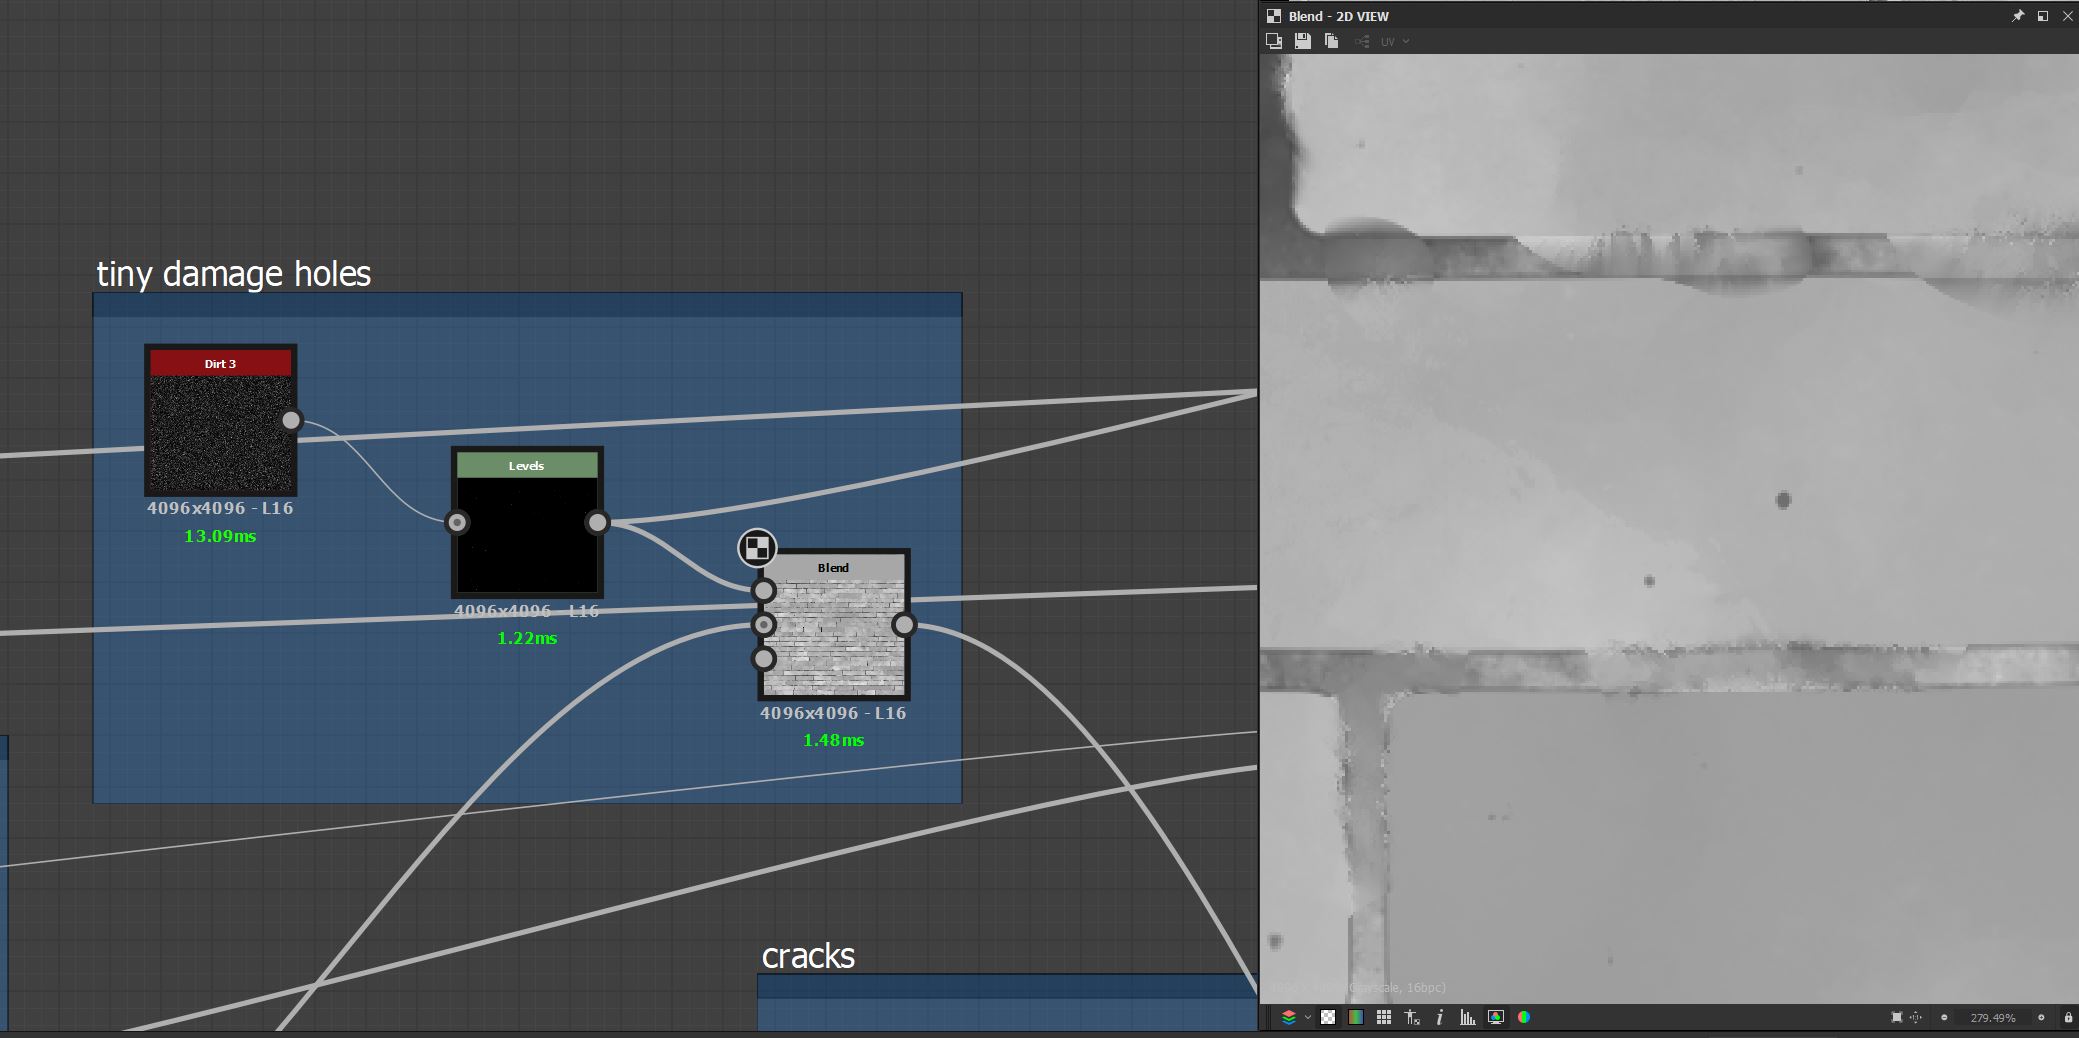
Then I added a bunch of holes in the crevices.
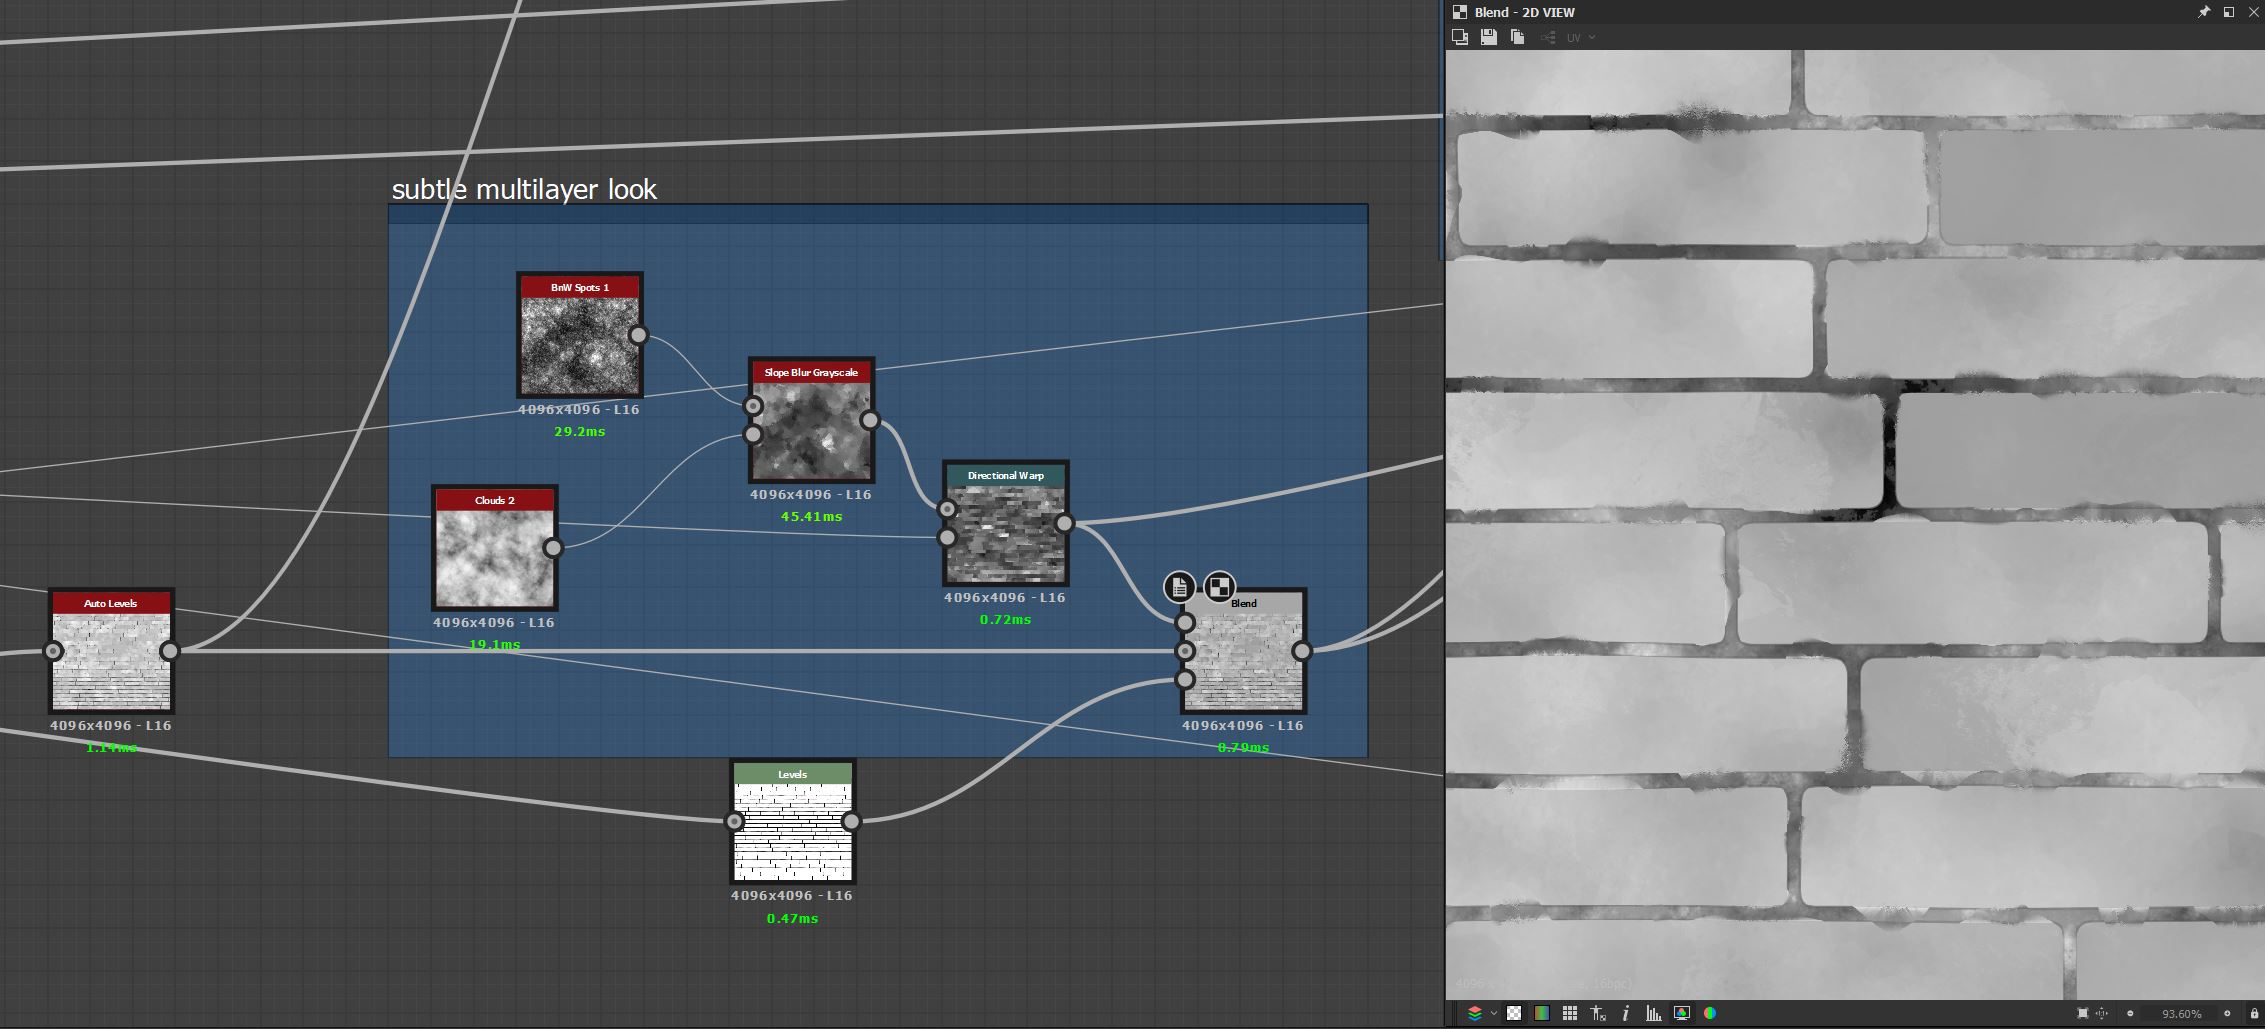
One challenge of making the bricks look like actual painted bricks and not just some bricks that are white for some weird reason, I wanted to make the walls look like they've been painted multiple times in some areas. To achieve this, I've used the Slope Blur node with a rather low amount of samples using two different types of noises as inputs.
Since the wall was used in a building where lots of people would walk around, I also added some tiny bumps indicating that some stuff bumped into the wall.
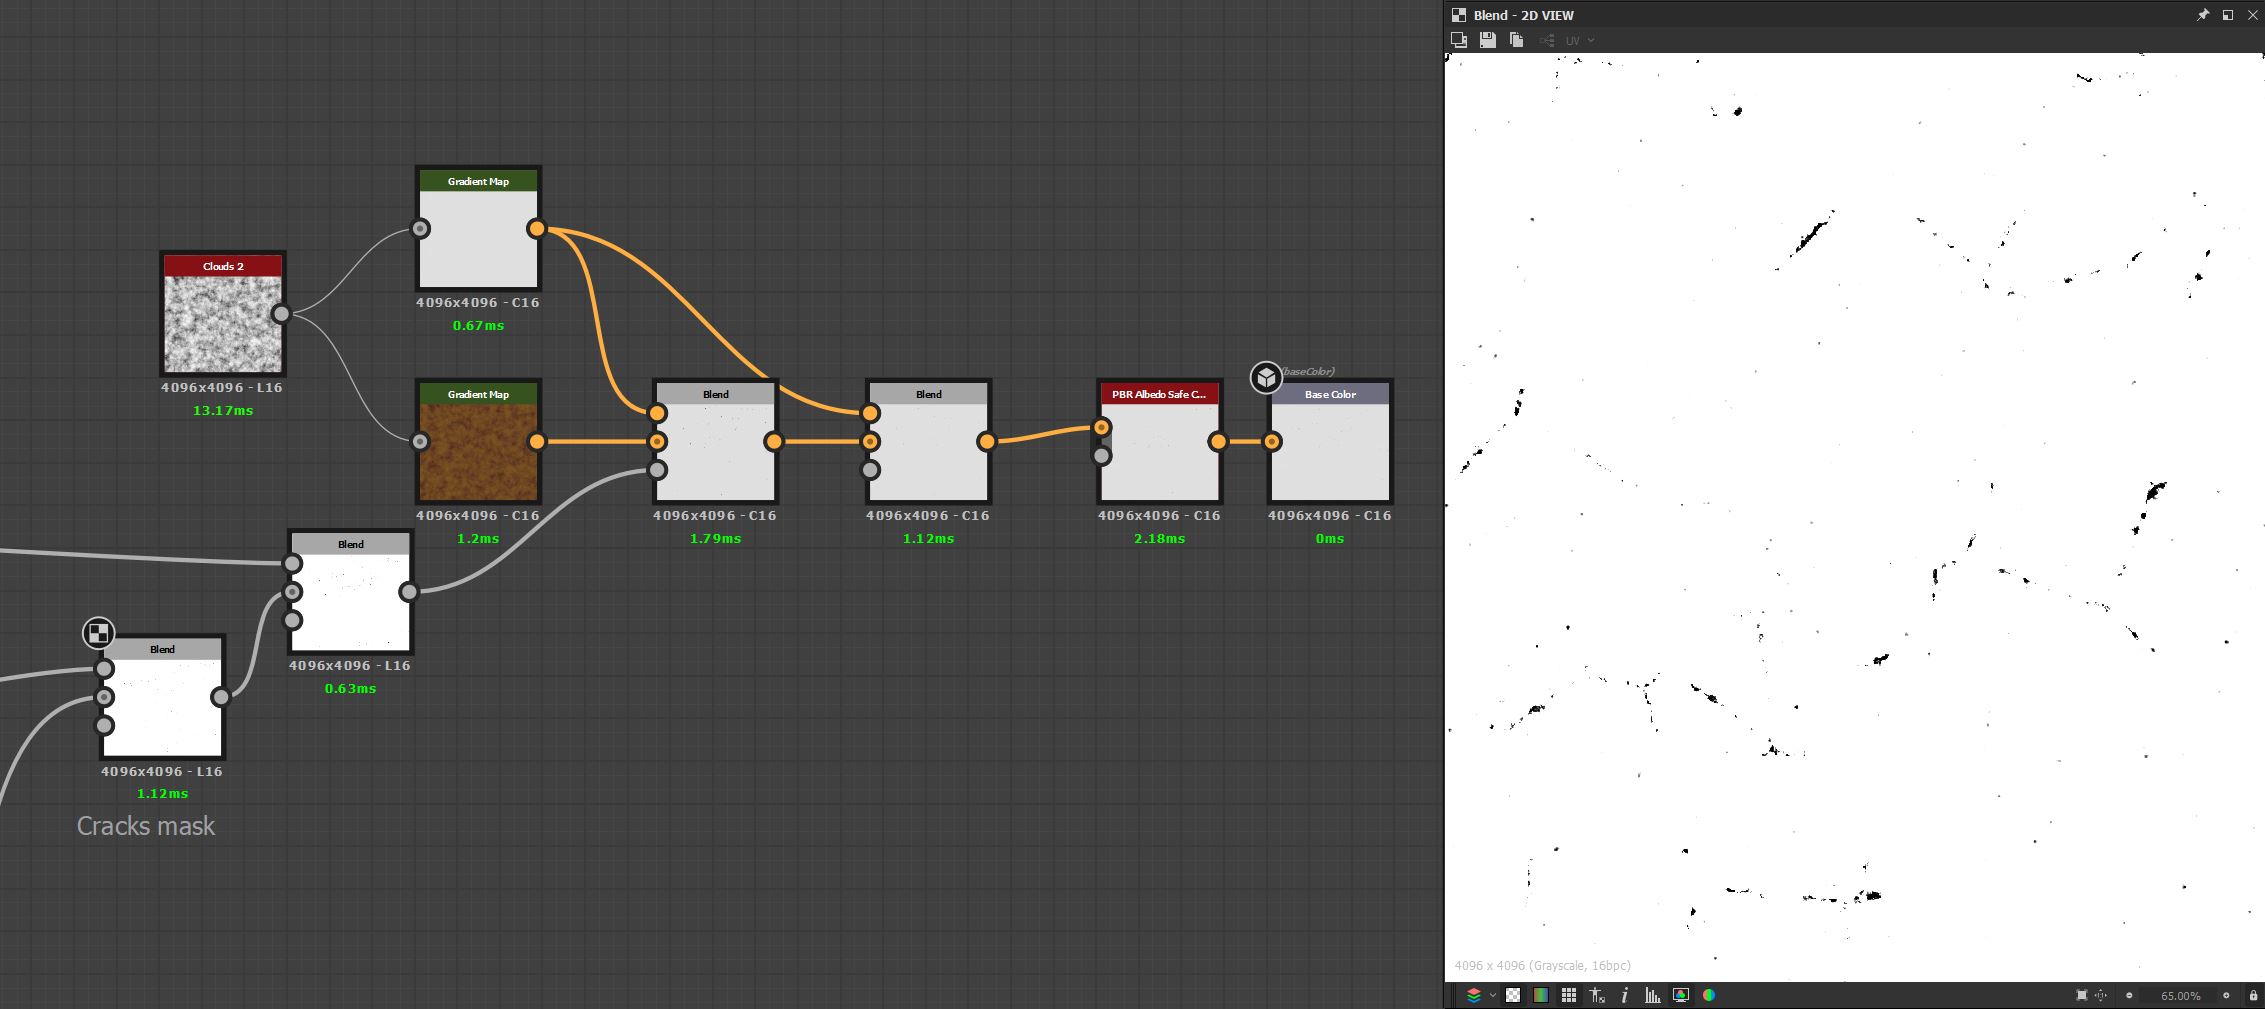
Next, I added some cracks two some bricks, which I think really helped to make it look more realistic and "used".

Between the bricks, I also added some height, as if some paint was covering some of the crevices.
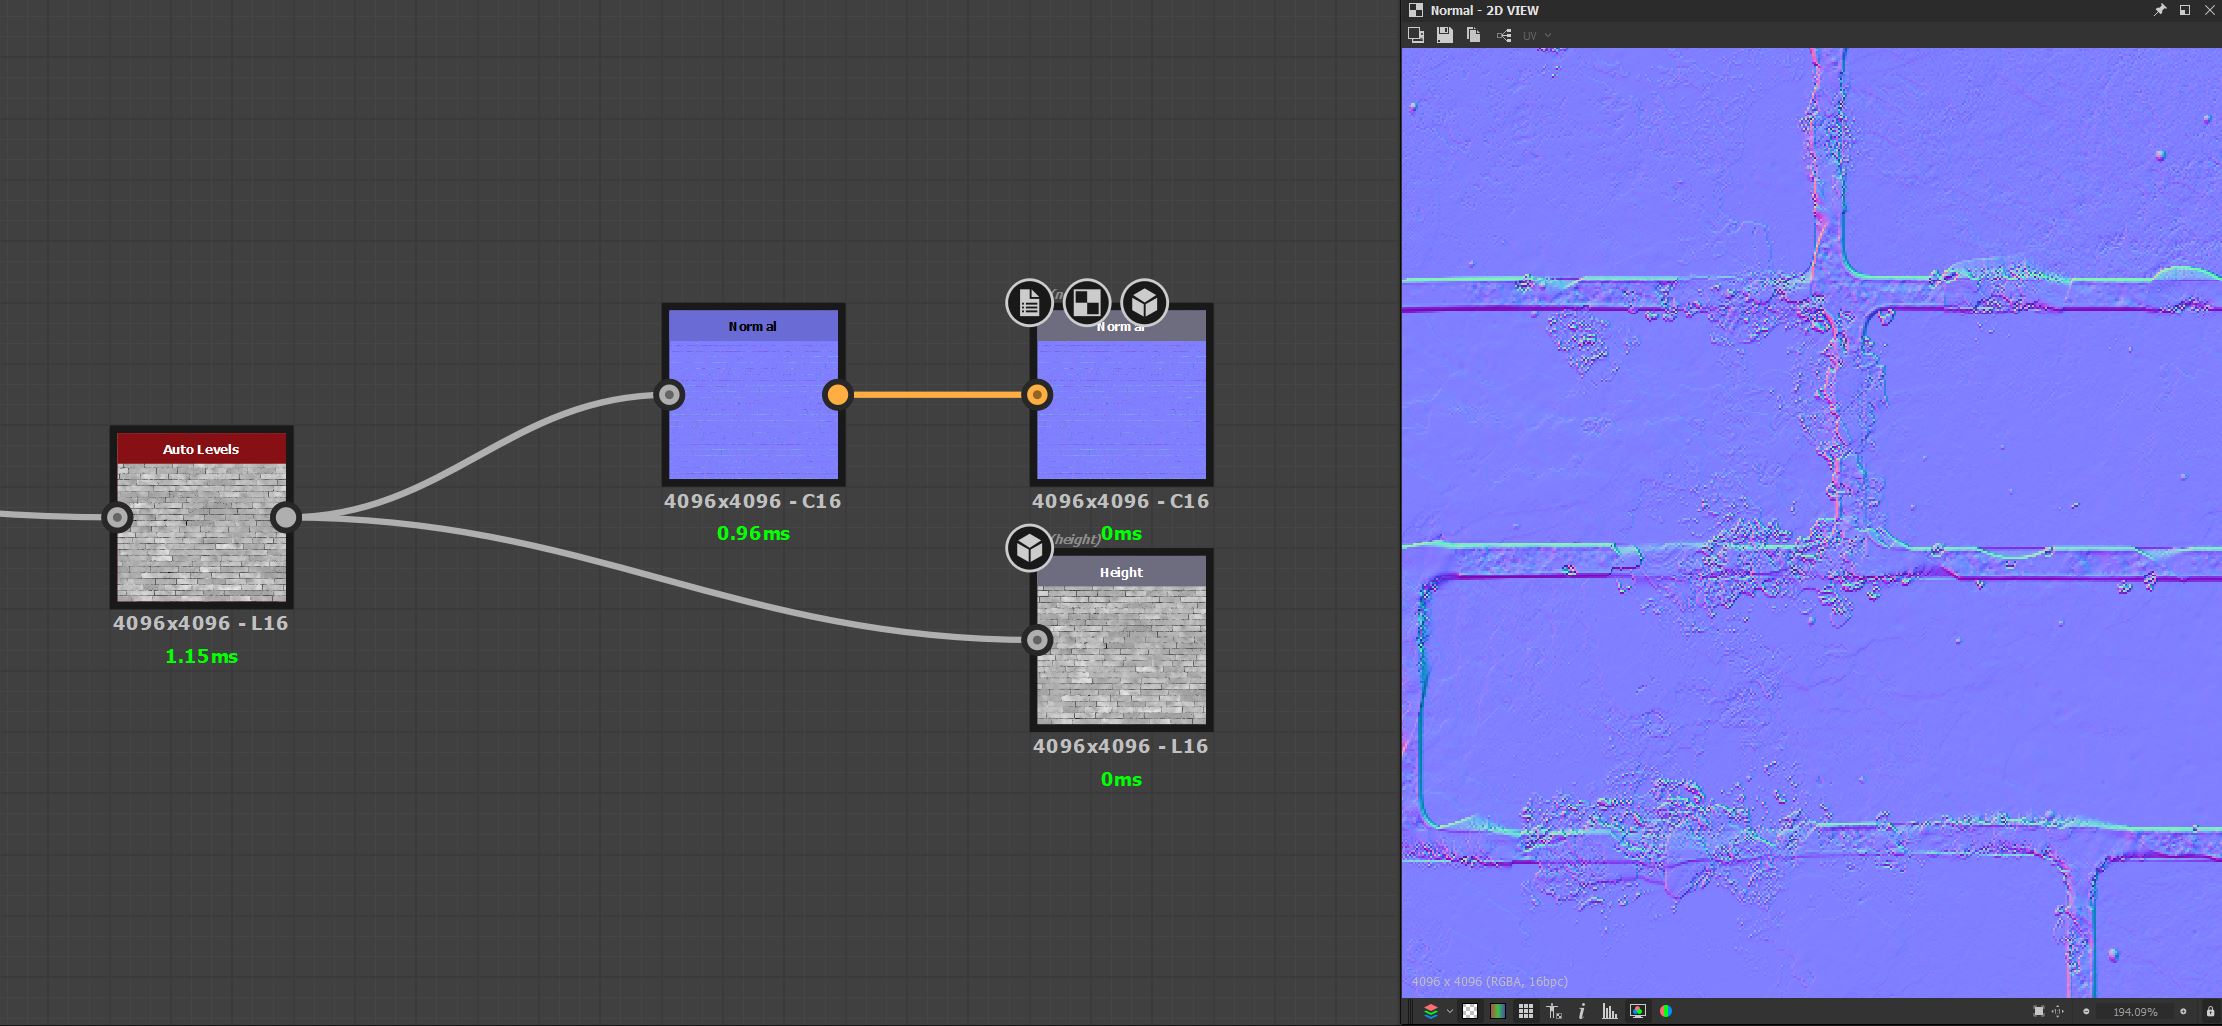
The map is then plugged into the Height channel, and after a conversion to normals in the Normal channel.
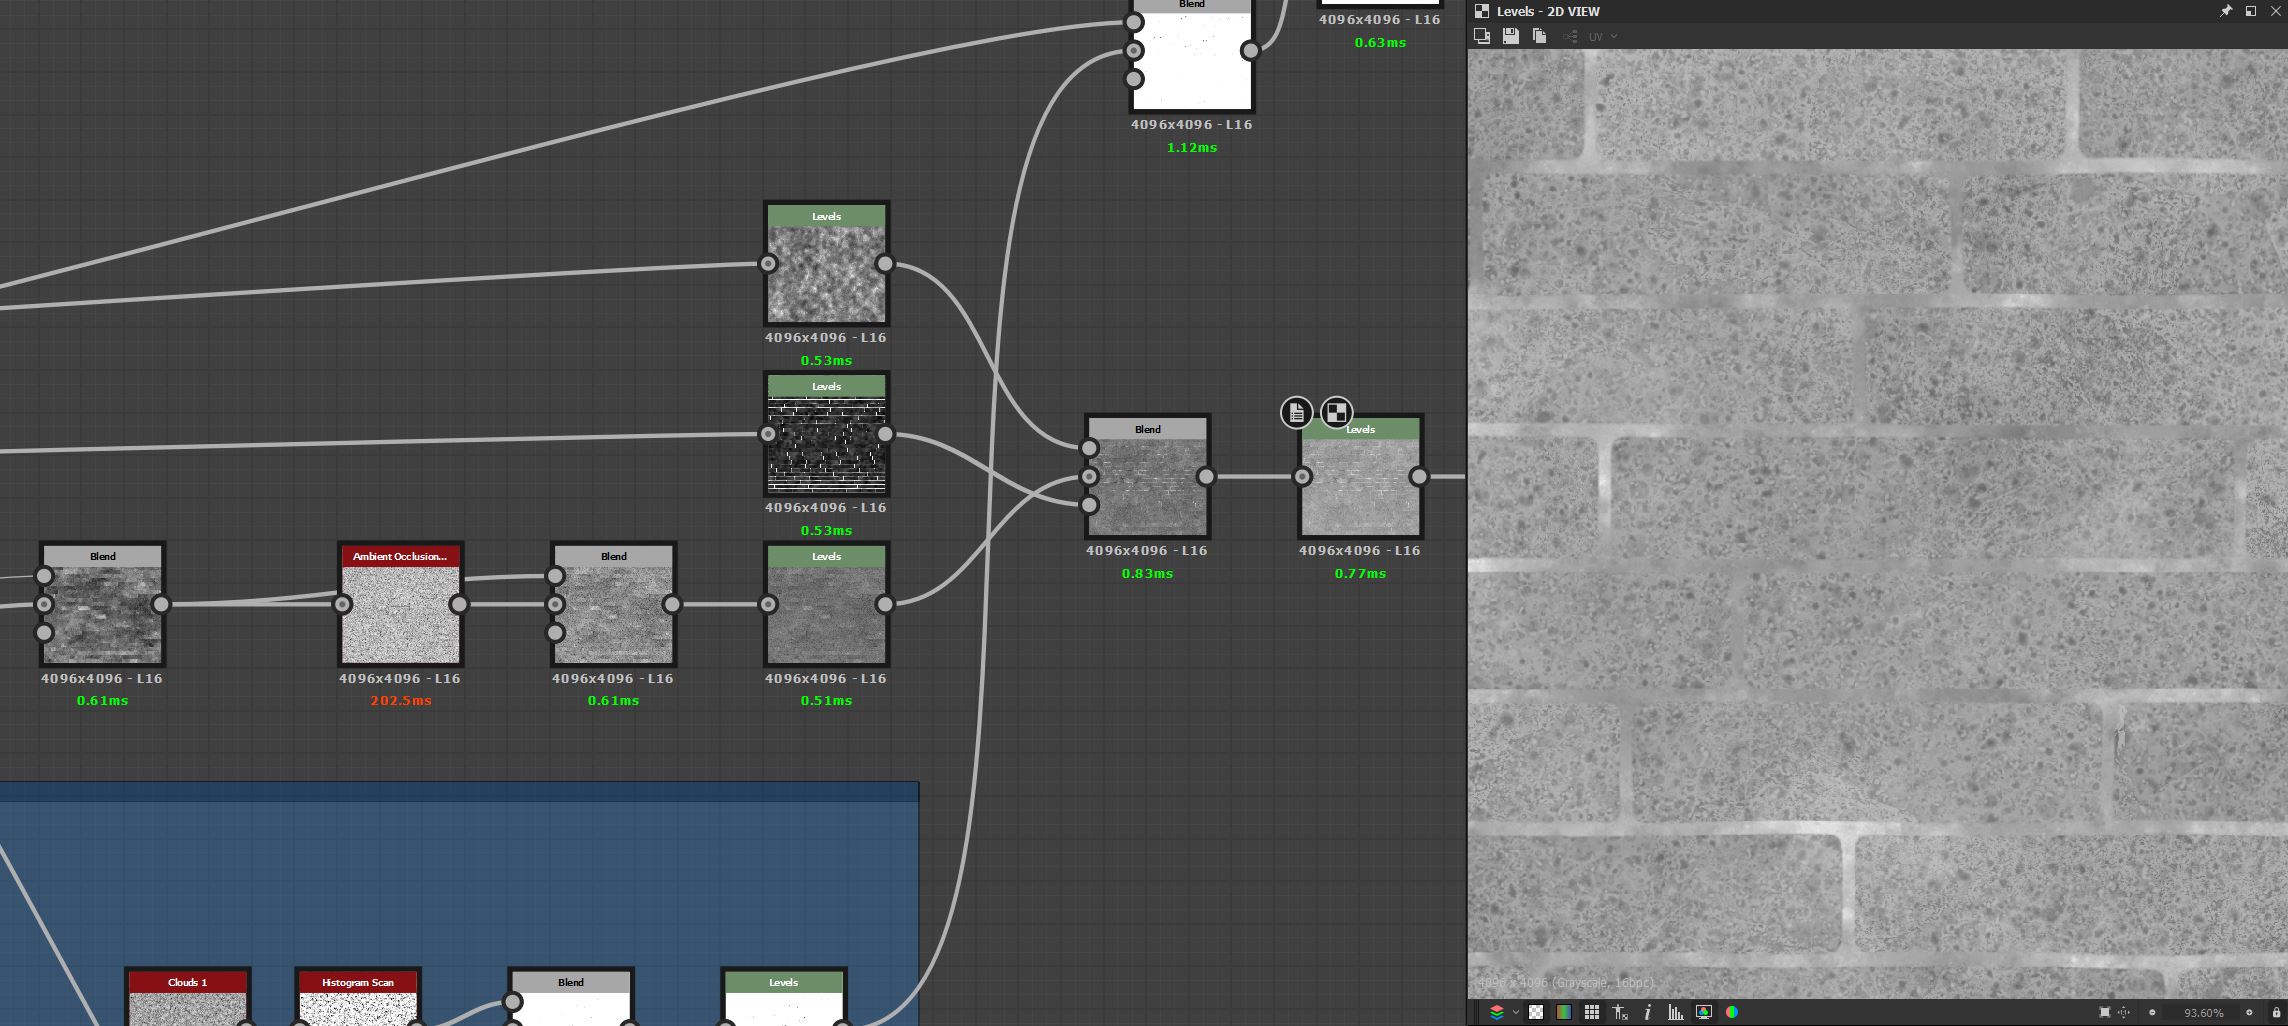
The roughness map of this material is pretty simple since it is just two different noises: One for the crevices, one for the bricks.
The Base Color map is quite simple as well: It is mostly a white map with some soft color variation overall and a slight yellowish/brownish white color for the cracks.
(Note: Rendered in the screenshot below is the mask for the cracks, not the last node.)
The entire graph can be downloaded at 1:1 resolution
Parquet Flooring 09
The next one I'd like to break down is the Parquet Flooring 09:

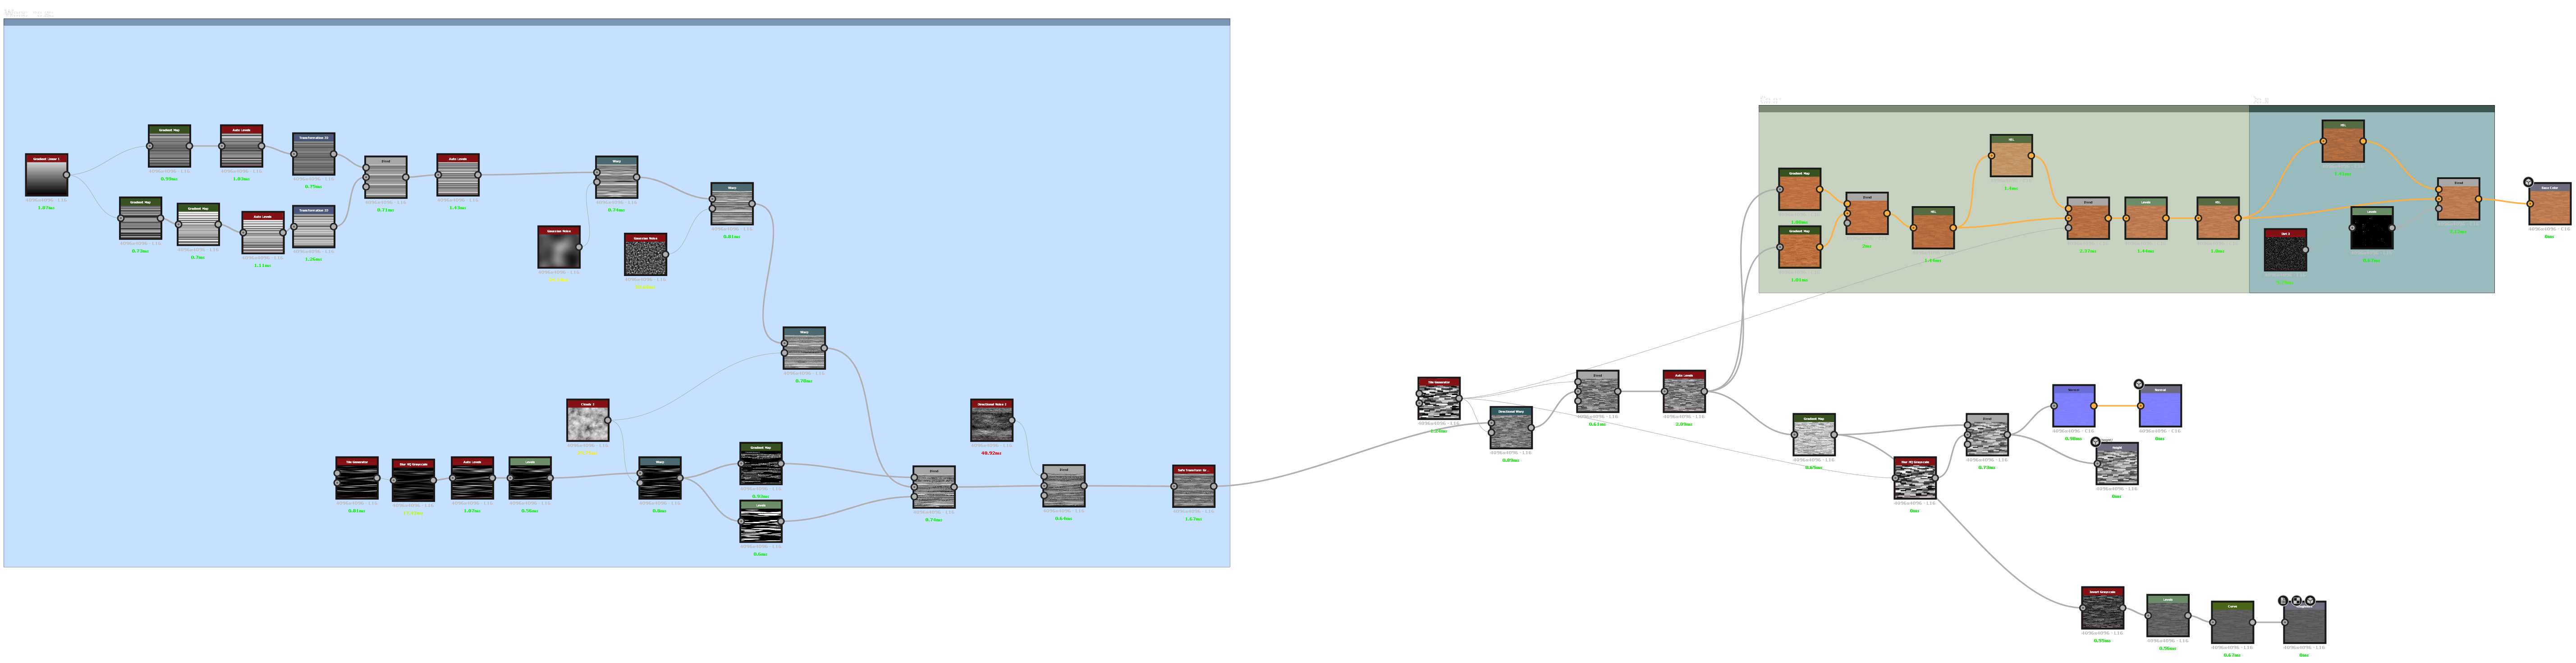
Here, I started with a bunch of lines created using a linear bottom-to-top gradient and a bunch of gradient maps. These lines will end up being wood grains.
Then, to make them wavy and shaky, I warped them using three different noises: One large Gaussian noise, a smaller one and Clouds 2 node. The first one helps to make the lines follow a curve rather than a perfectly straight line, the other two produce more noise and detailed edges of the lines.
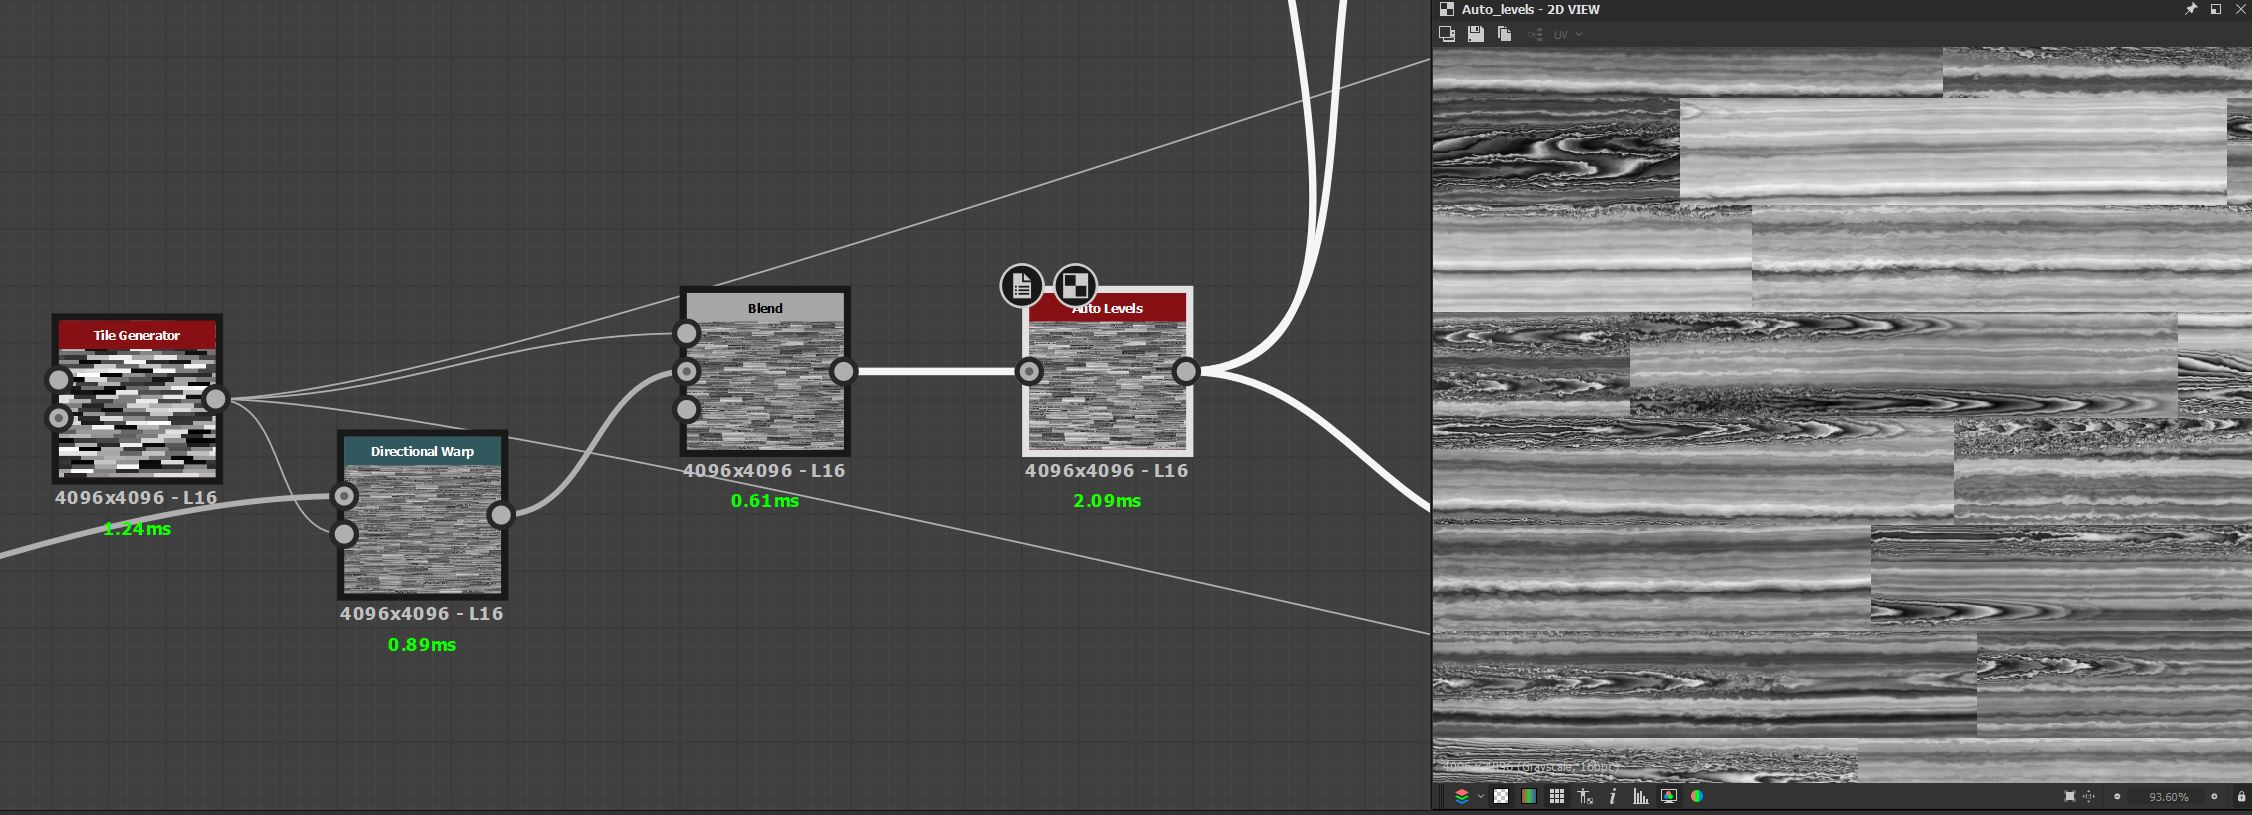
Next, I wanted to create some wood knot thingy. To create the base for this, I used the Tile Generator with a stretched bell (a round, soft shape) as the input shape.
After that, wood grains that wrap around the oval shape are created with the help of the Gradient Map node.

Then, the (more or less) straight wood grains and the oval-shaped ones are combined. A Directional Noise 2 node helps to add detail.
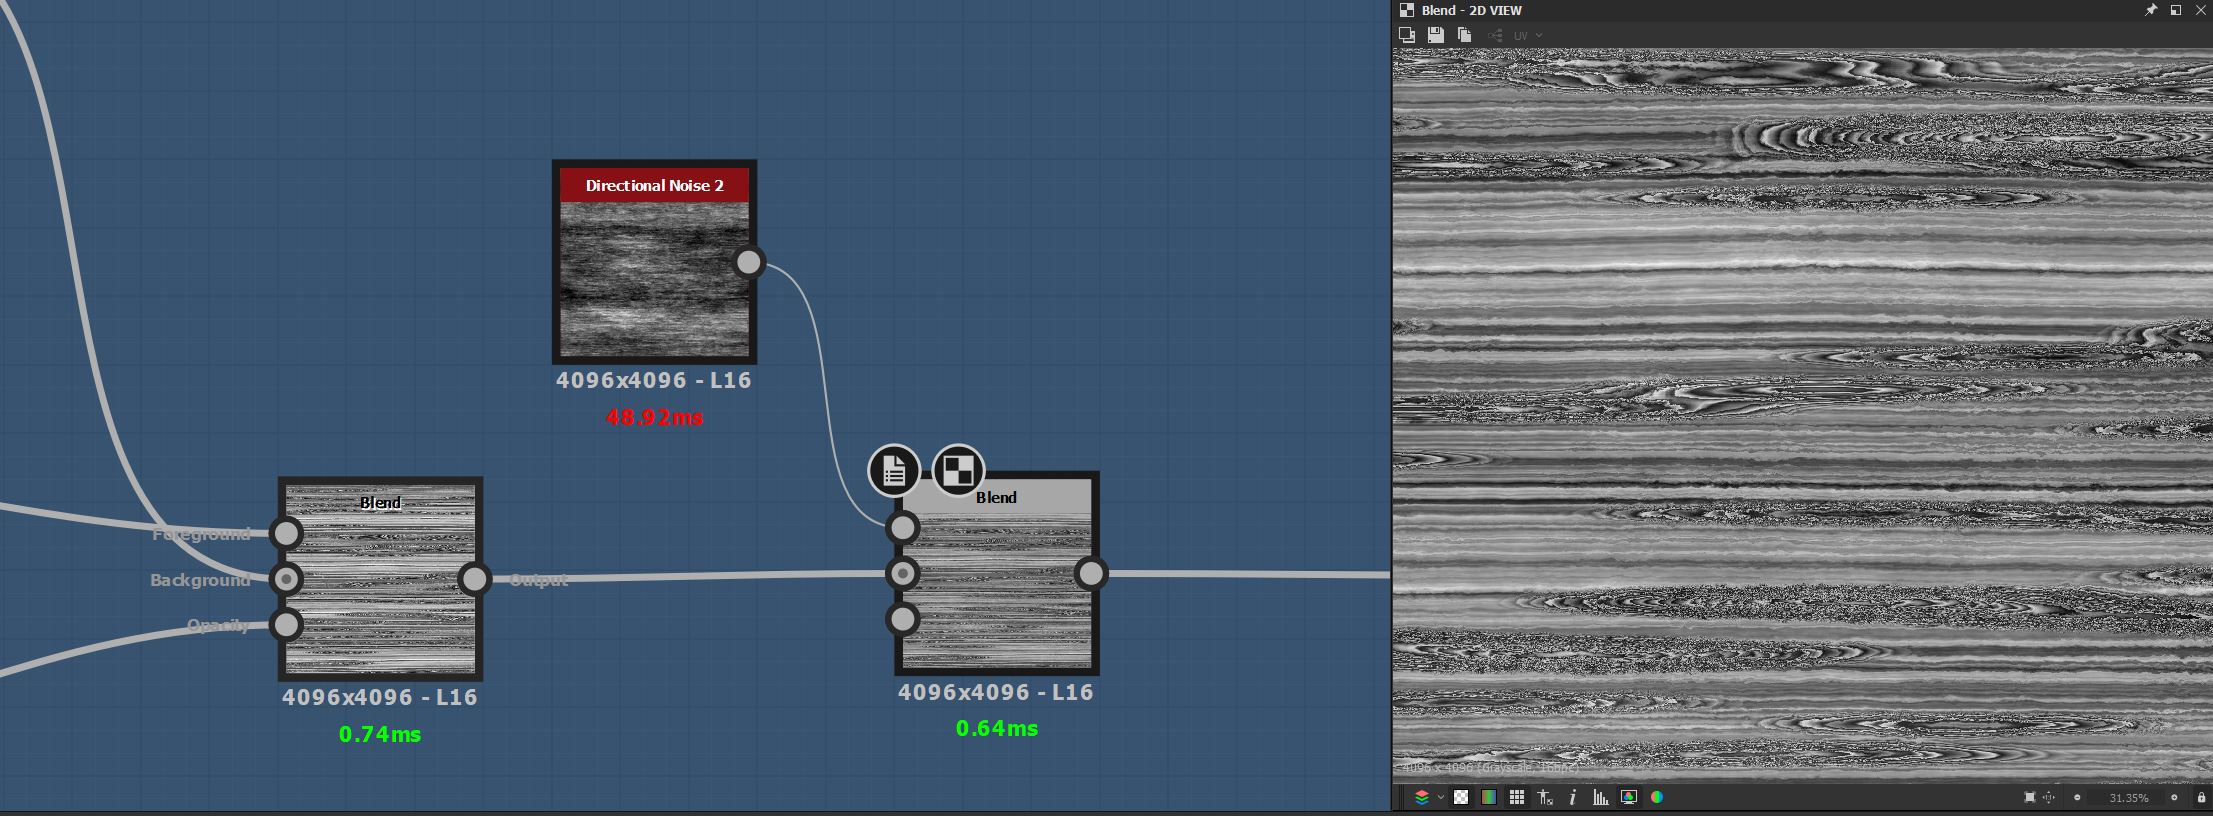
The pattern is warped based on planks with random values generated using a Tile Generator. The Tile Generator also is used to darken some of the planks.
Then, the wood texture is colorized using a bunch of gradient maps, HSL and Levels nodes. Here I was mostly picking colors from reference photos of wood and tweaking and combining them until it looked right.
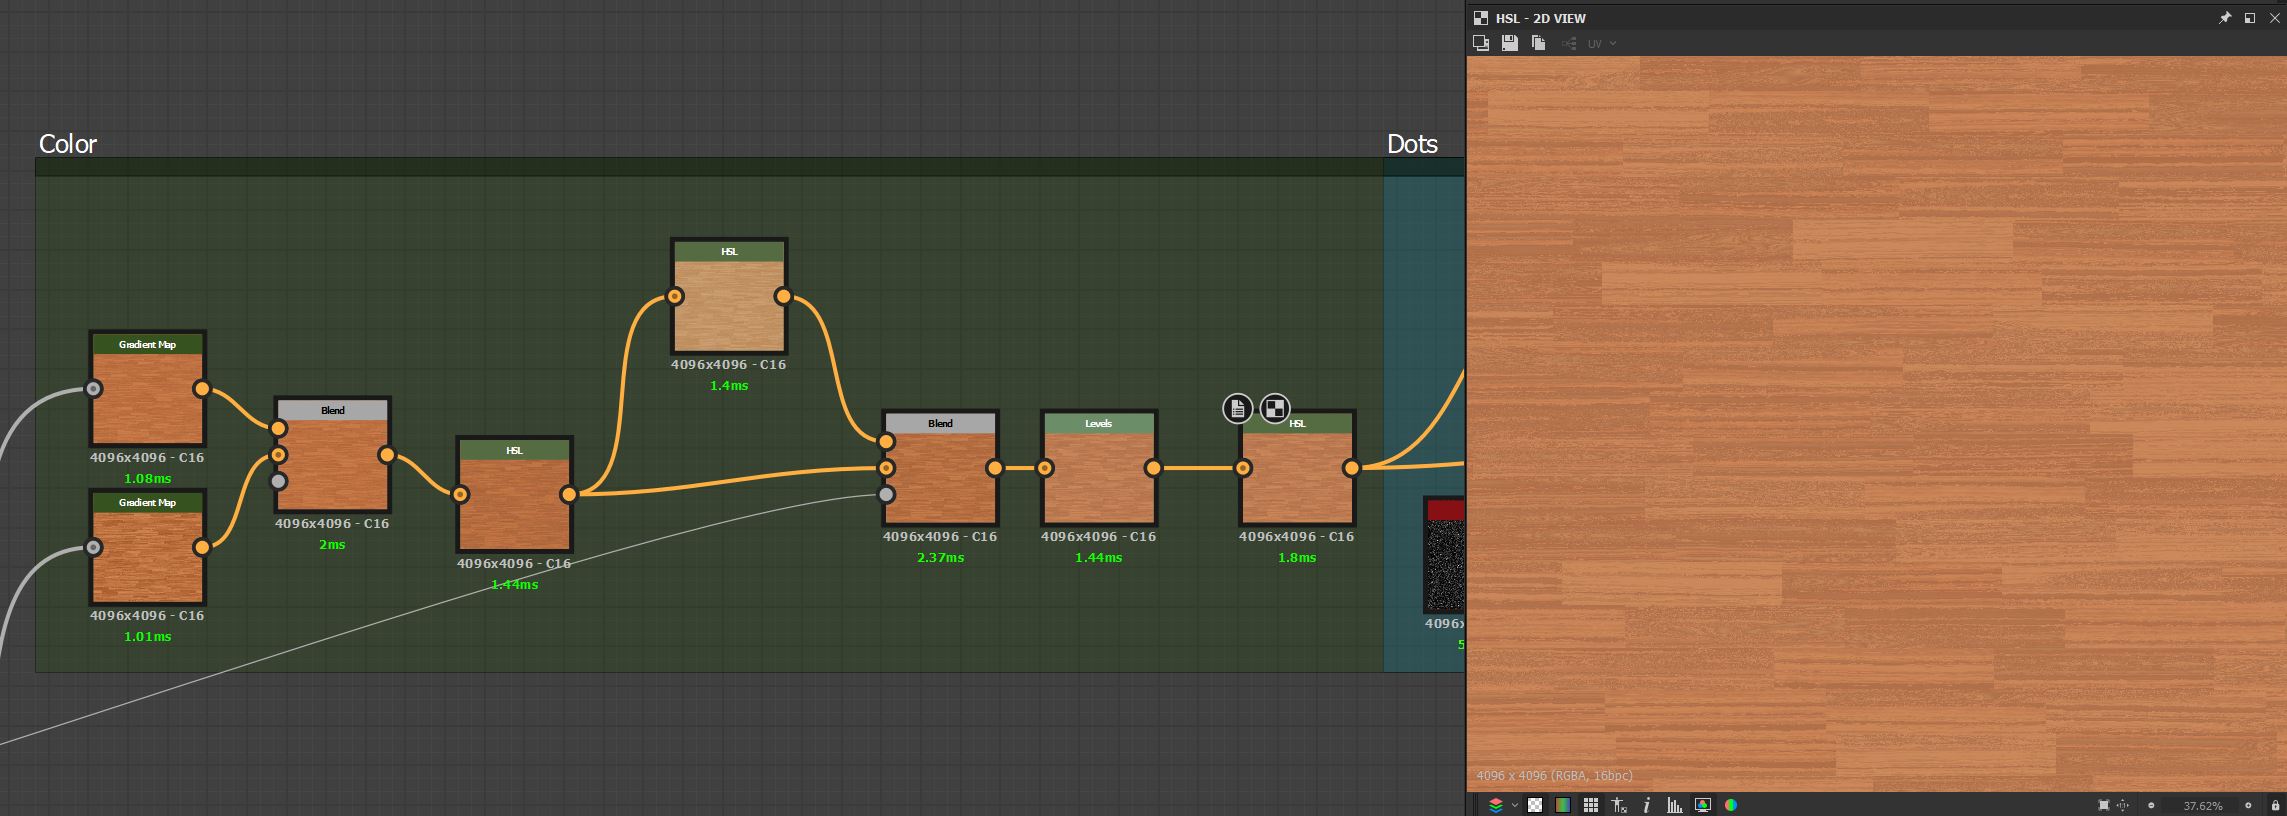
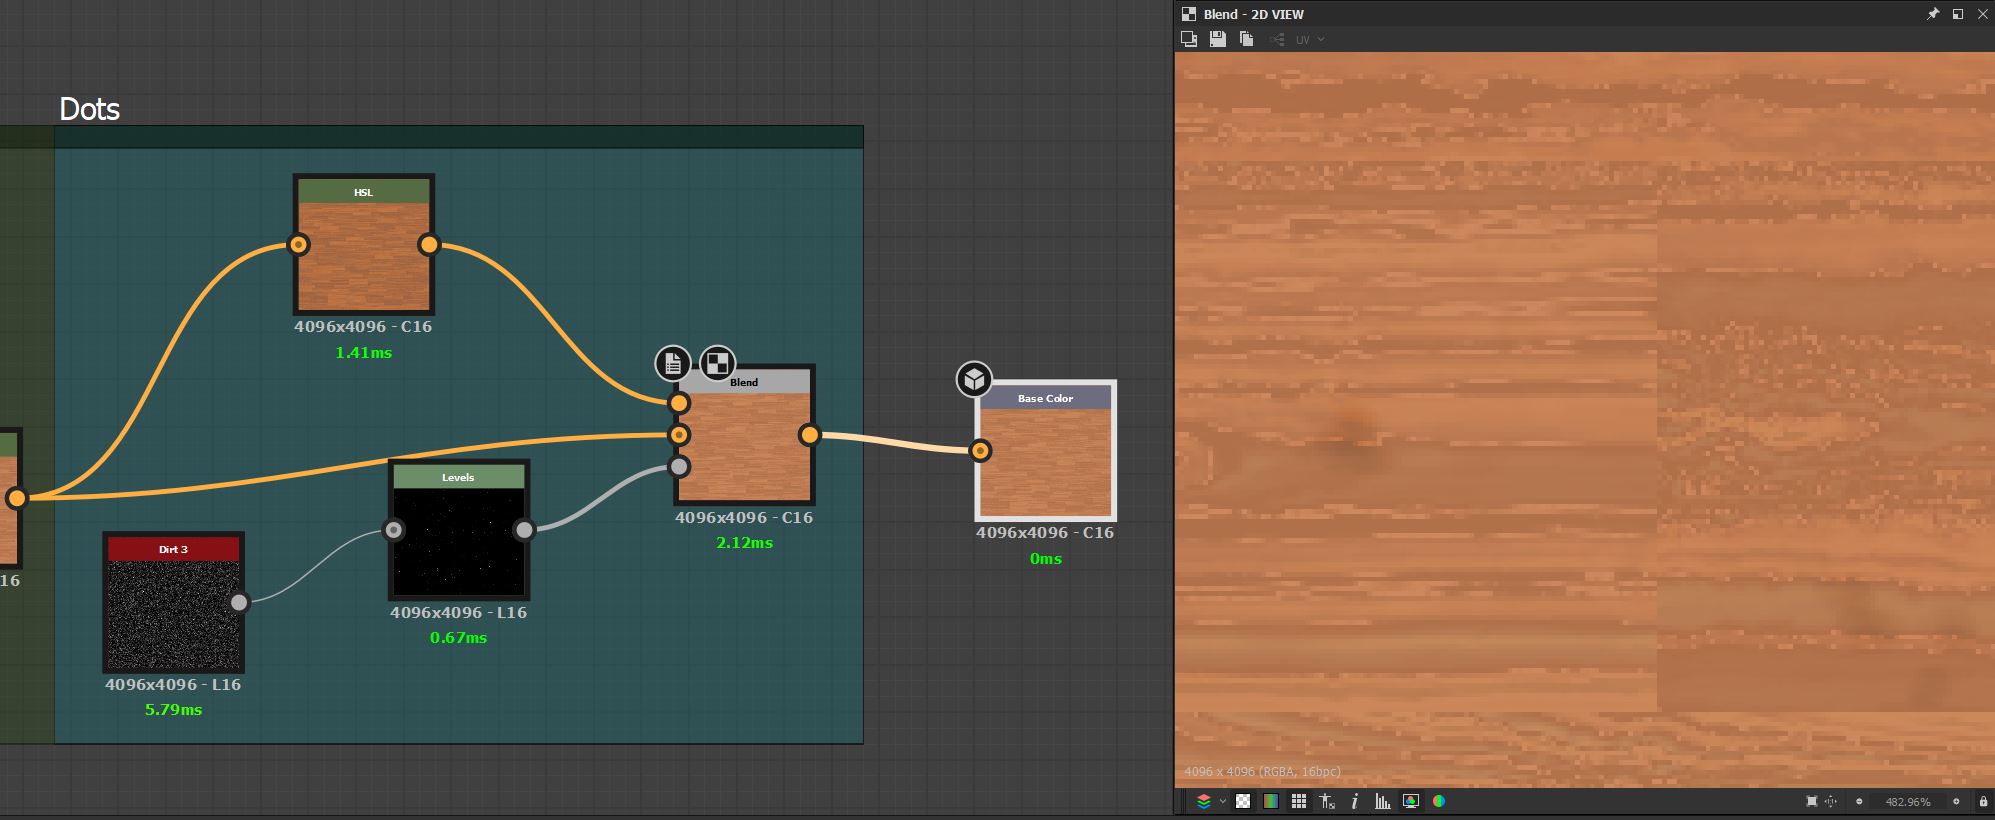
Some dark spots are added.
The normal map and the height map are created using the grayscale wood grains.

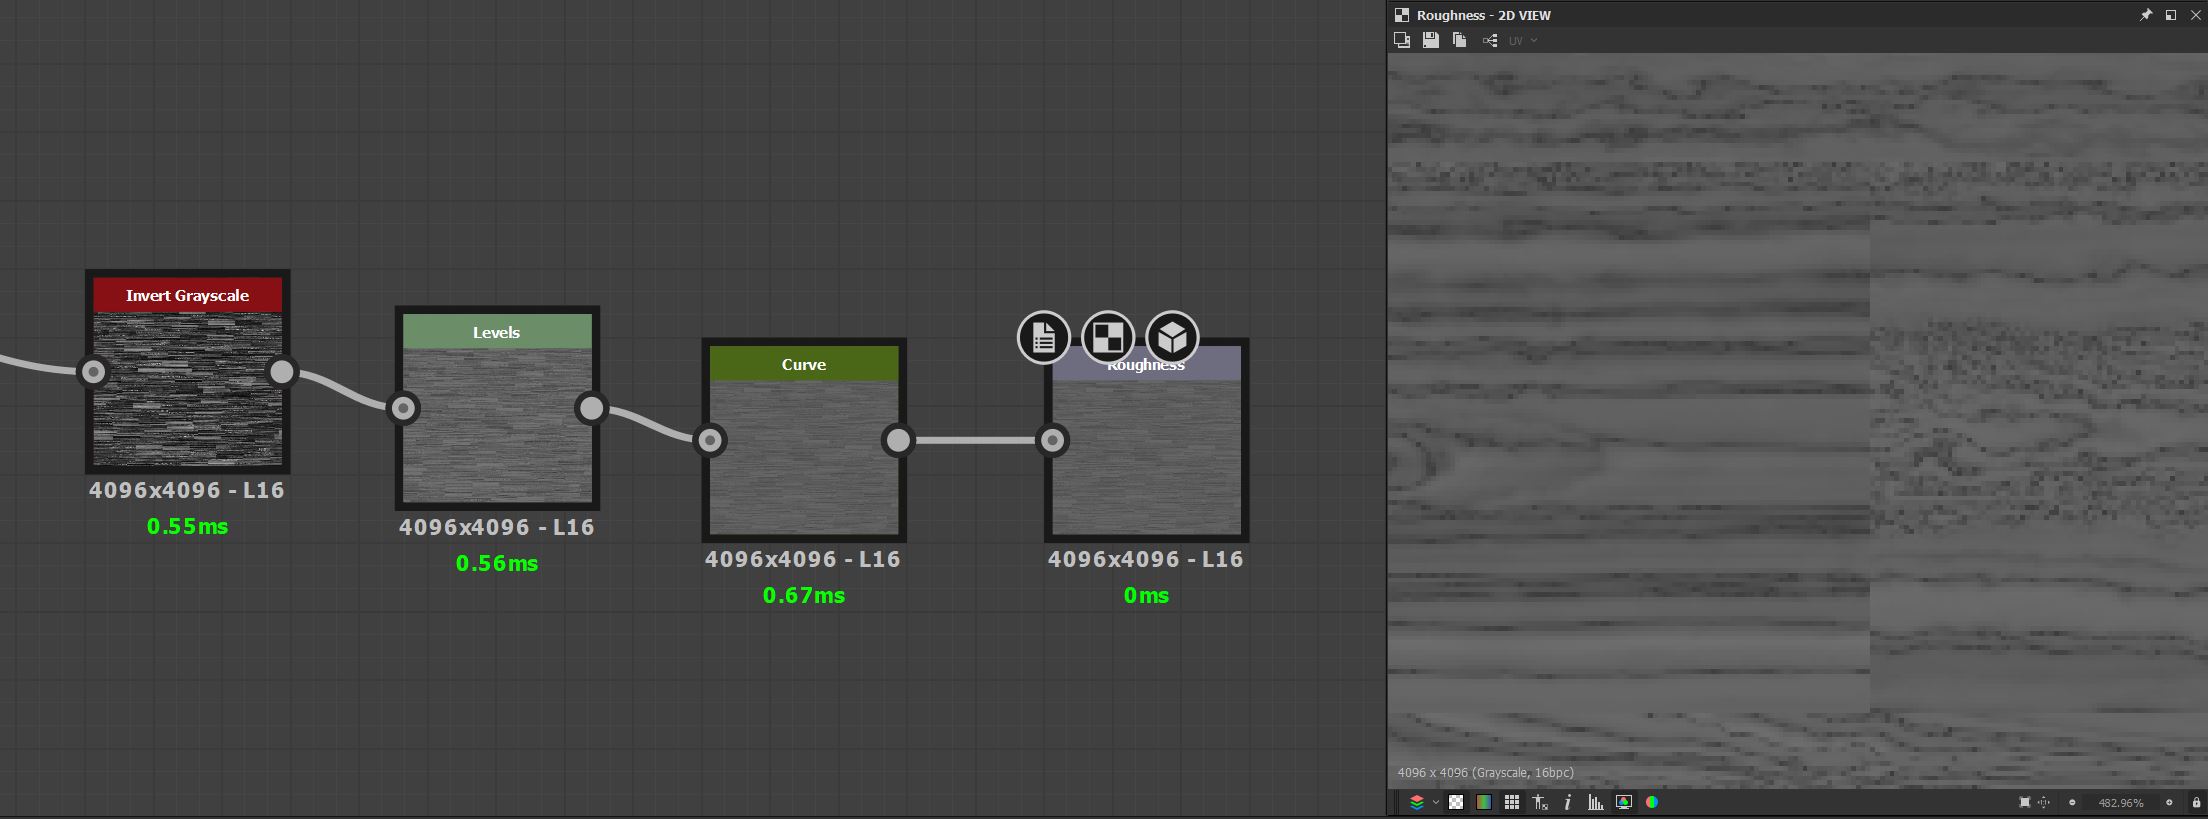
For the roughness map, I simply used the inverse of the grayscale wood grains and adjusted them using the Levels and the Curve node.
The entire graph can be downloaded at 1:1 resolution
The PBR maps of most of the materials created for the building are available for download.